How to install VPN on Windows
(This is based on Windows 10)
Open a web browser and go to https://software.lbl.gov
Login with your LDAP name and password
Click on IT Supported Downloads on the left
Scroll down and click on Cisco VPN
Under Cisco VPN AnyConnect 4.x.xxxxx, click on Download
Save the file
Open the downloaded file, LBL-Anyconnect-VPN-win-4.x.xxxxx-pre-deploy-k9.exe
- Go through the prompts and click Install at the last window
- Click Yes at the User Account Control window
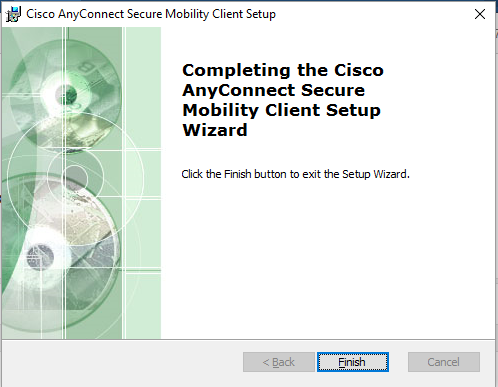
- Click Finish
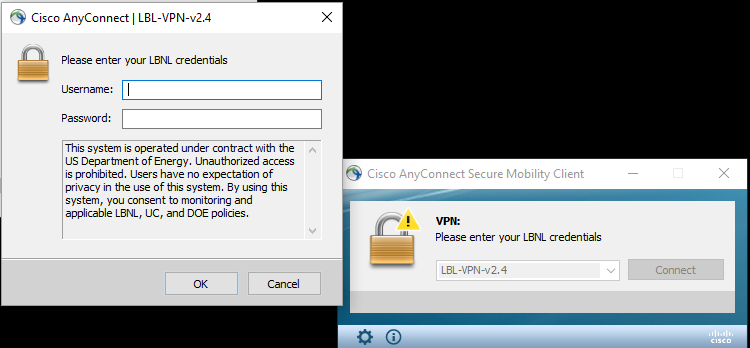
- Start the application by going to Windows logo-> All apps-> Cisco-> Cisco AnyConnect Secure Mobility Client
- Enter your LDAP name and password to connect
How to install VPN on Mac
(This is based on Sierra)
Open a web browser and go to https://software.lbl.gov
Login with your LDAP name and password
Click on IT Supported Downloads on the left
Scroll down and click on Cisco VPN
Under Cisco VPN AnyConnect 4.x.xxxxx, click on Download
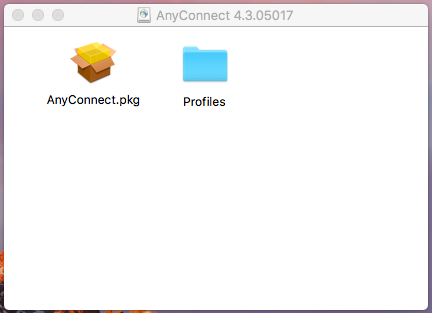
Click on the downloaded file, anyconnect-macosx-i386-4.x.xxxxx-k9-LBL.dmg
Double-click on AnyConnect.pkg
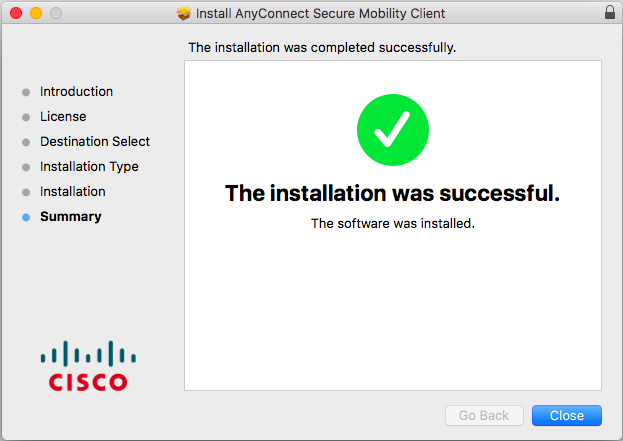
Go through the prompts and click Install at the last window
- Enter your Mac login name and password and click Install Software
- Close the window
- Go to Launchpad and click on the Cisco logo to start the application
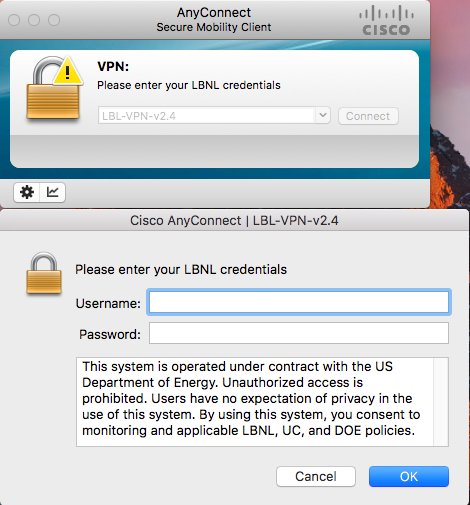
- Enter your LDAP name and password to connect
How to install VPN on Linux
(This is based on Centos 7)
Open a web browser and go to https://software.lbl.gov
Login with your LDAP name and password
Click on IT Supported Downloads on the left
Scroll down and click on Cisco VPN
Under Cisco VPN AnyConnect 4.x.xxxxx for Linux 64-bit, click on Download
Save the file
Click on the downloaded file, anyconnect-predeploy-linux-64-4.x.xxxxx-k9-LBL.tar.gz
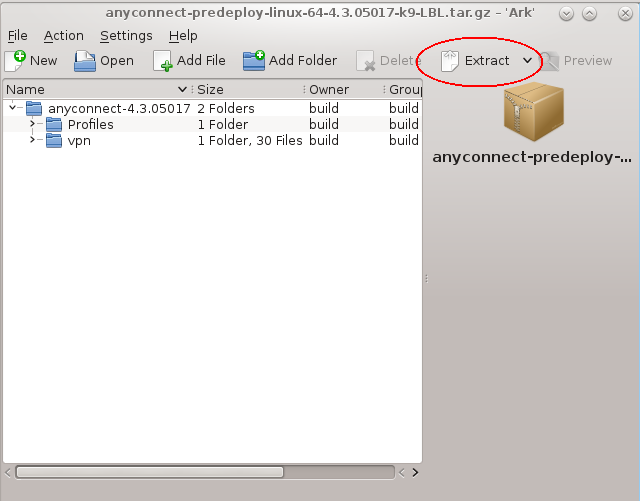
Click the Extract button
An Extract window appears. Select where you want the extracted folder to go and click OK
Close the window in Step 8
Open Konsole (under Applications→ System)
From Konsole, go inside the vpn directory under the anyconnect-4.x.xxxxx directory (where the folder was extracted in Step 9) and execute the installation script as root: # ./vpn_install.sh
Accept license agreement
After installation is done, type exit twice to close Konsole
Go to Applications→ Internet→ Cisco AnyConnect Secure Mobility Client→ Cisco AnyConnect Secure Mobility Client to start the client
If the application does not start (the icon bounces for a bit and goes away), bring up Konsole and install these two items:
yum install epel-release
yum install pangox-compat
Launch Cisco AnyConnect Secure Mobility Client again. Enter your LDAP name and password to connect
How to install VPN on Chromebook
(This is based on Chrome OS version 57)
(Install app)
Sign in to your Chromebook
Click the Launcher
Click on Web Store (click All Apps if Web Store does not show)
Type anyconnect in the search box
- Cisco AnyConnect will appear under Apps. Click Add To Chrome
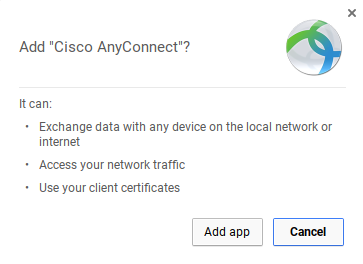
- Click Add app
- The app is installed
(Import profile)
Open a web browser and go to https://software.lbl.gov
Login with your LDAP name and password
Click on IT Supported Downloads on the left
Scroll down and click on Cisco VPN
- Under Cisco VPN AnyConnect LBNL-Profile Only, click on Download
- Go to Launcher-> AnyConnect
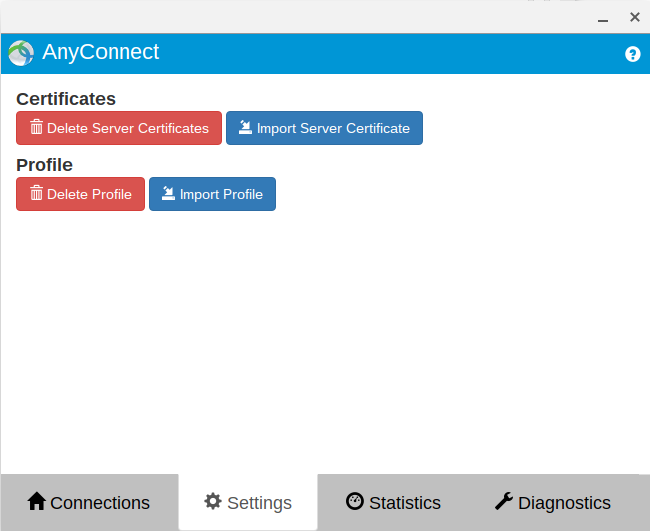
- Click on Settings tab-> Import Profile
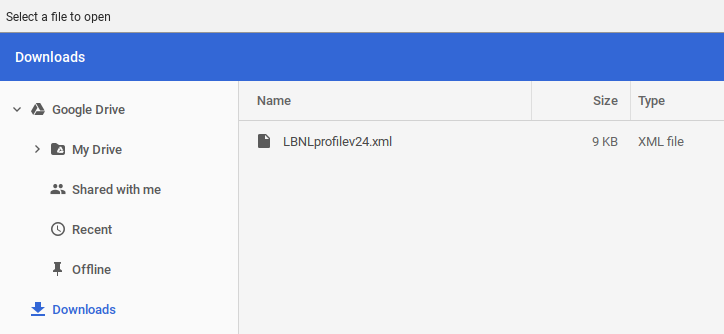
- Select LBNLprofilev24.xml and click Open
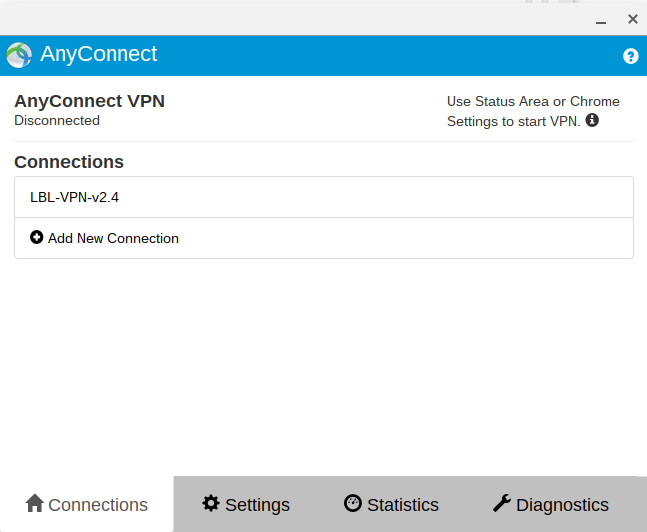
- Click on Connections tab and there should be LBL-VPN-v2.4 under Connections
- Close this window
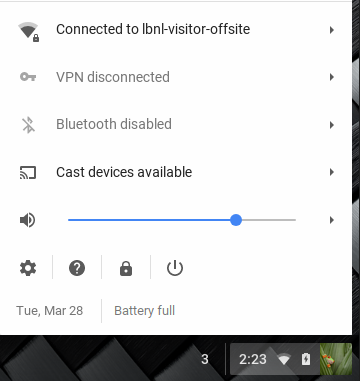
- Click on Status Area on bottom right and VPN should be on the list
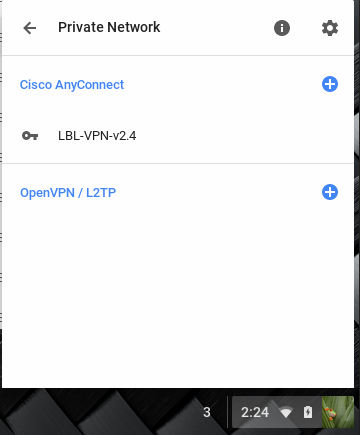
- Click on VPN disconnected then LBL-VPN-v2.4
- Enter your LDAP name and password to connect


