This guide provides instructions on how to set up your LBNL account so you can do an email campaign using YAMM (Yet Another Mail Merge).
Resolution:
If you need to create an email campaign, you will need to:
Make sure you have access to the email you want to send as
Install the add-on YAMM (Yet Another Mail Merge) to Google Sheets
1
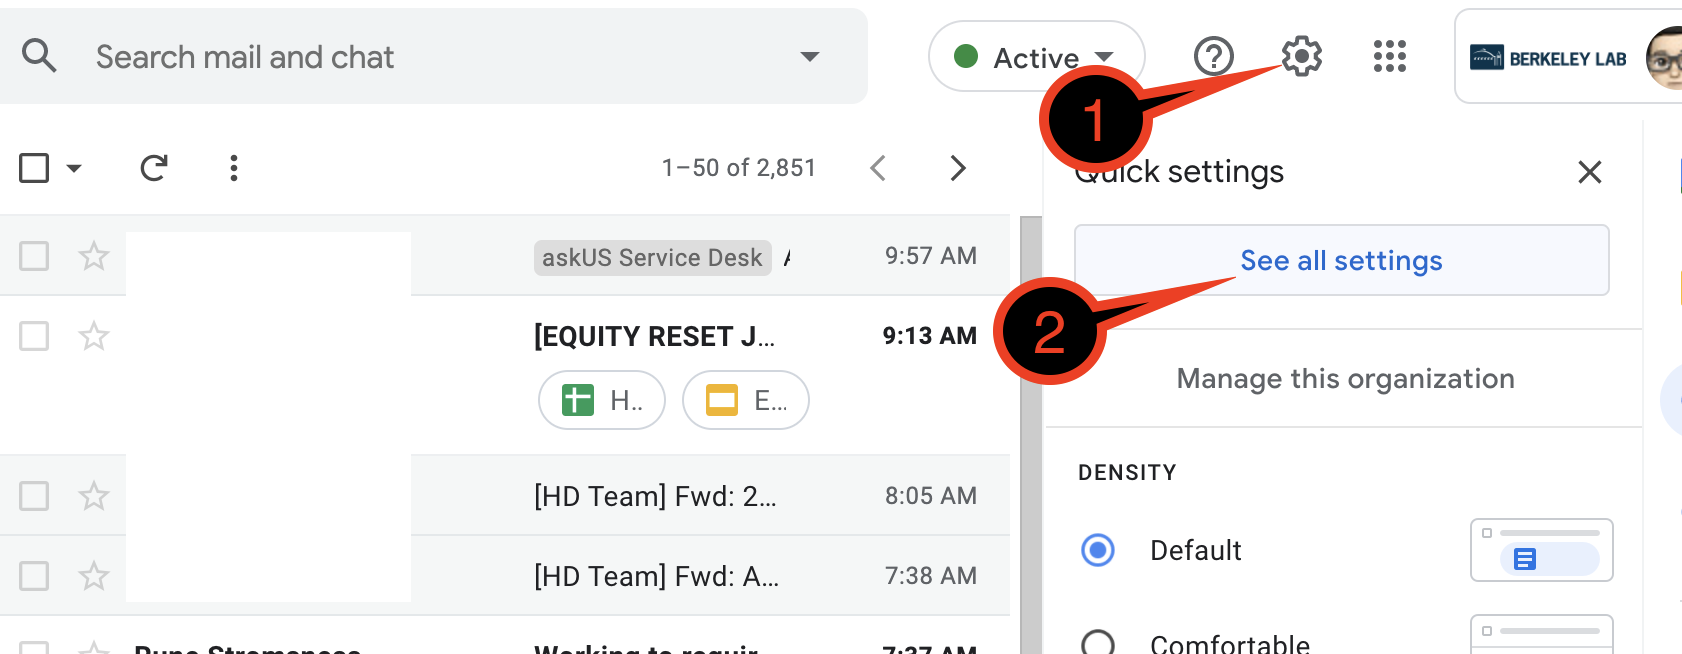
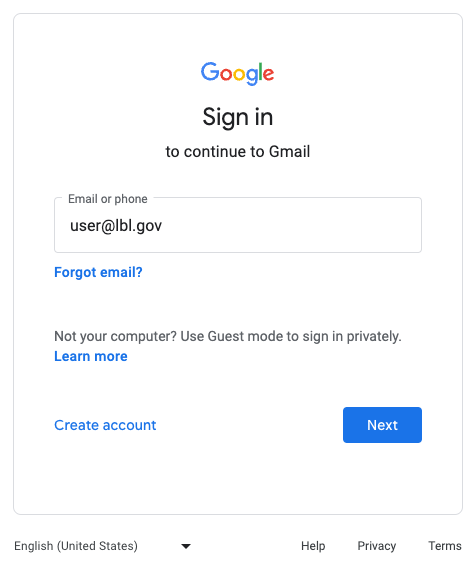
Sign in to your LBNL email account
Click the setting icon
Click See all settings
2
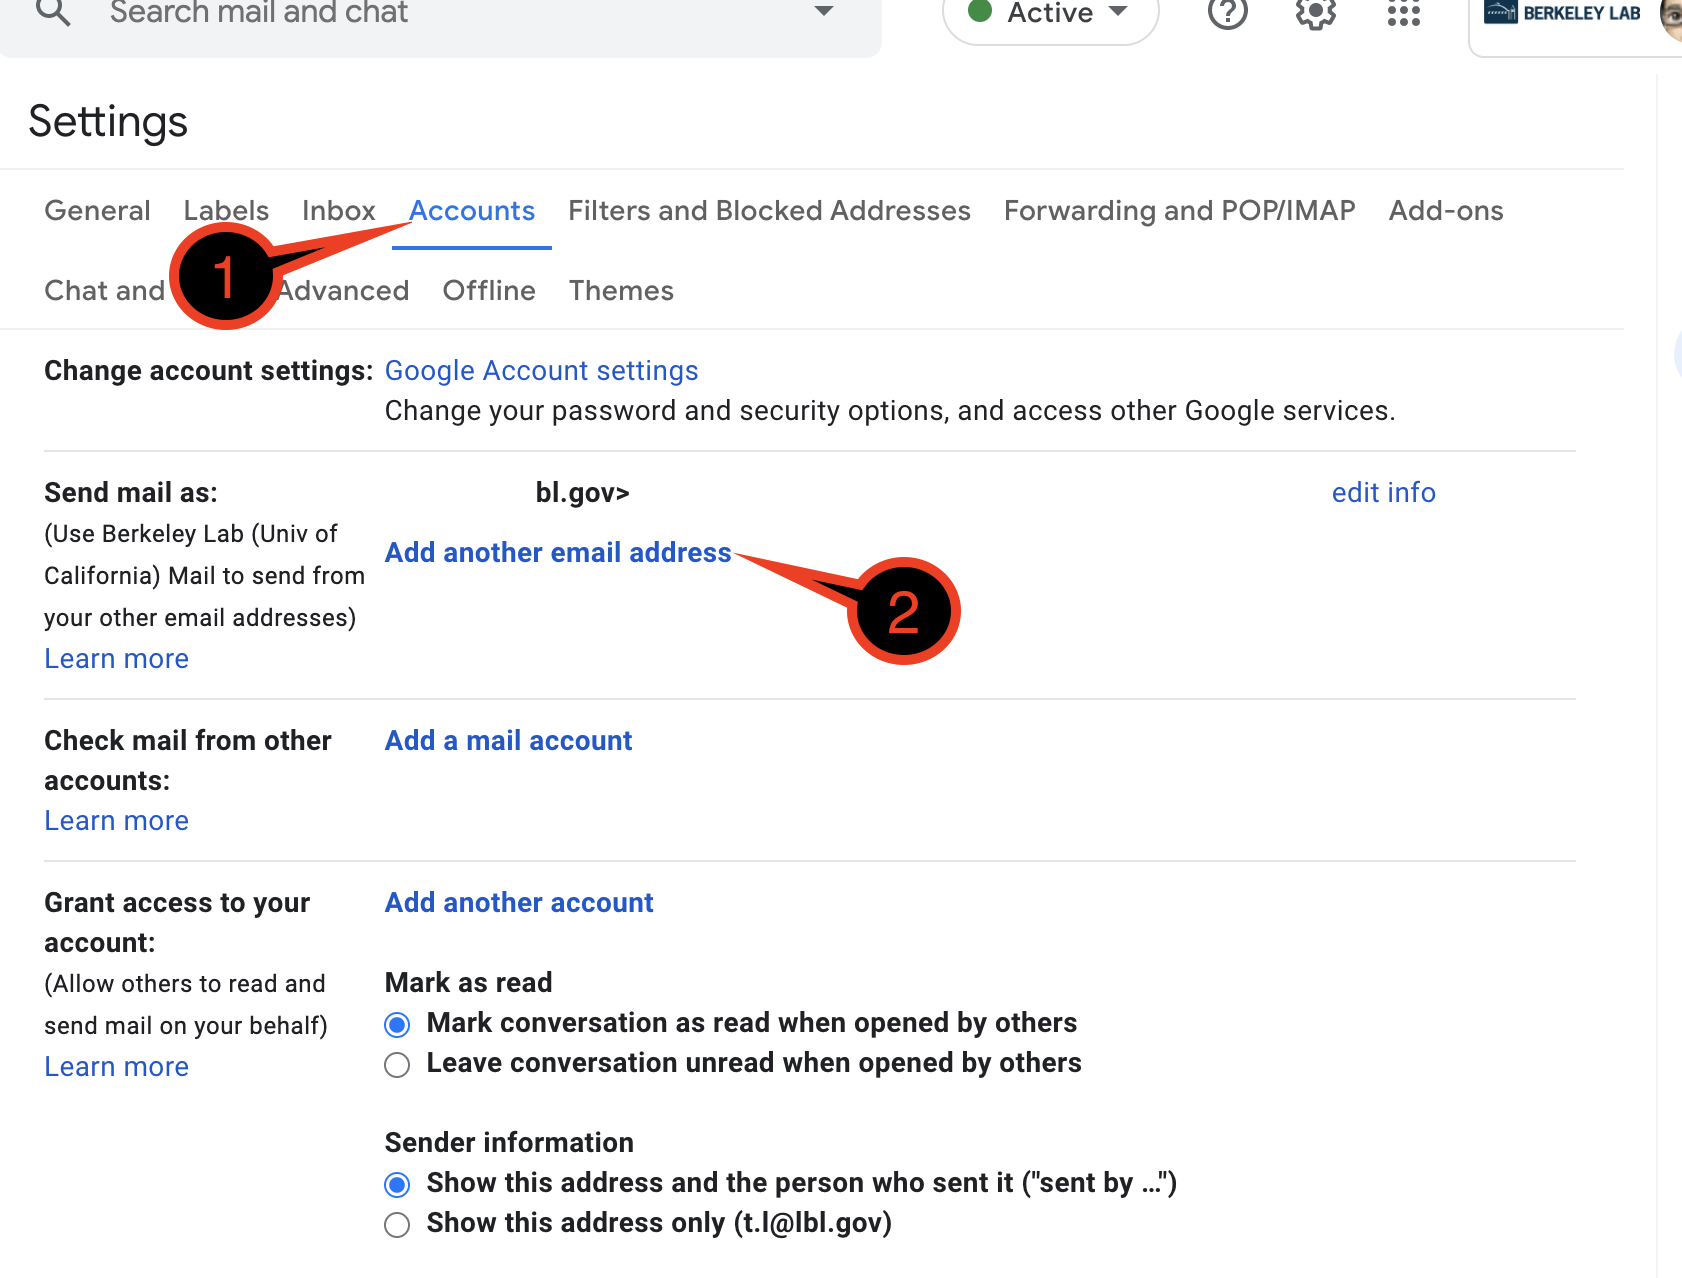
Select the Accounts
Under Send mail as section, click Add another email address
3
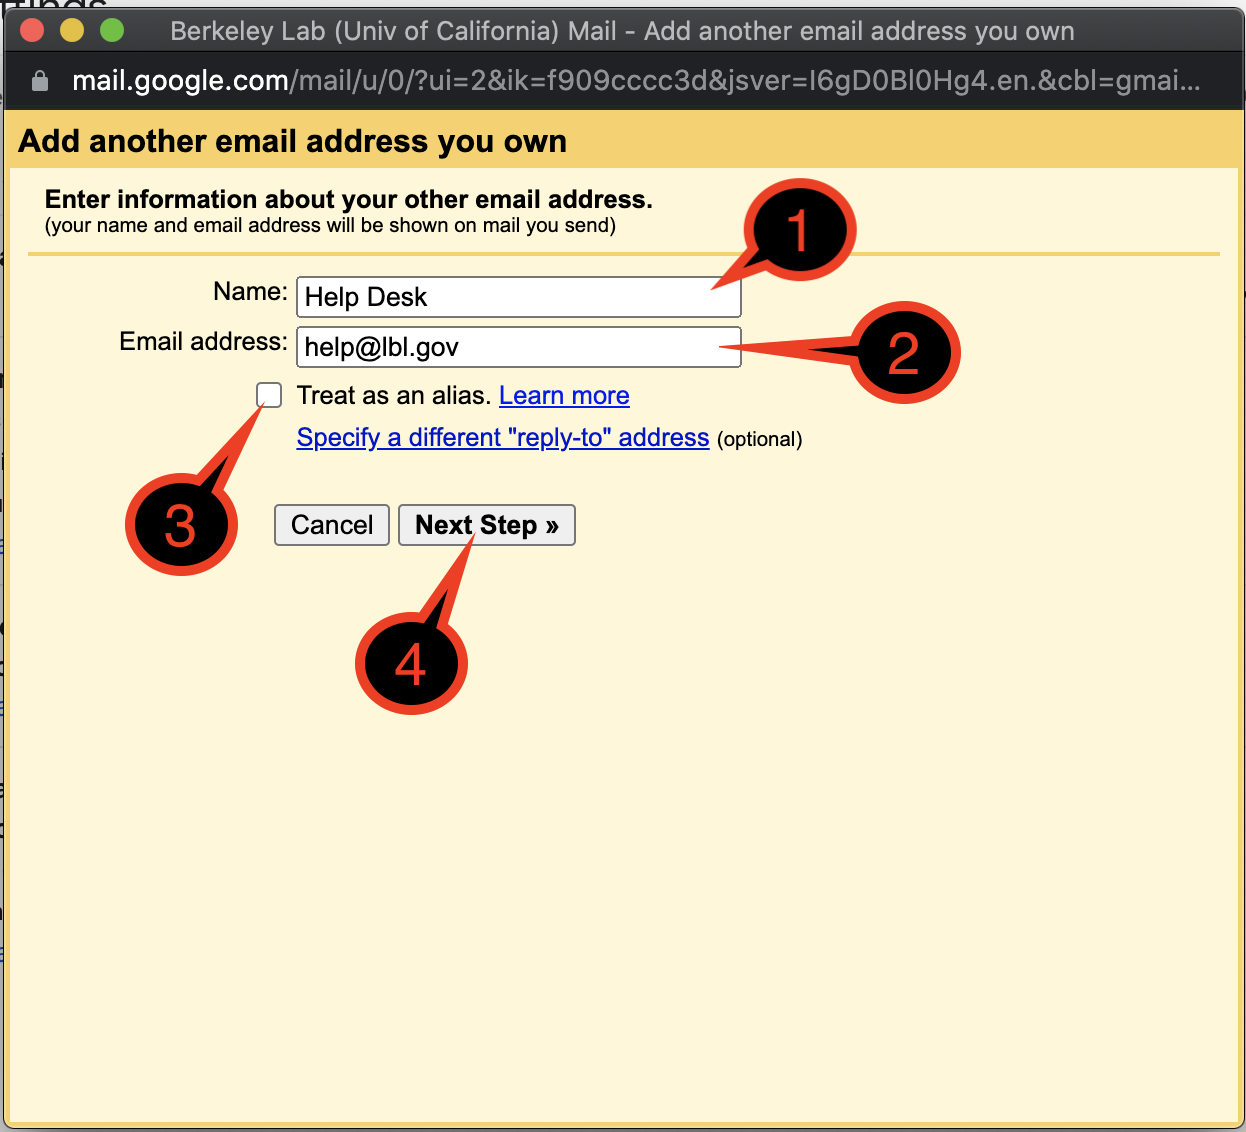
Under the Add another email address you own window:
in the Name field, type in a name for the email
In the Email address field, type inthe email address you want to add DO NOT type in help@lbl.gov - it will not work
Check the box for Treat as an alias
Click Next Step
4
Click Send Verification
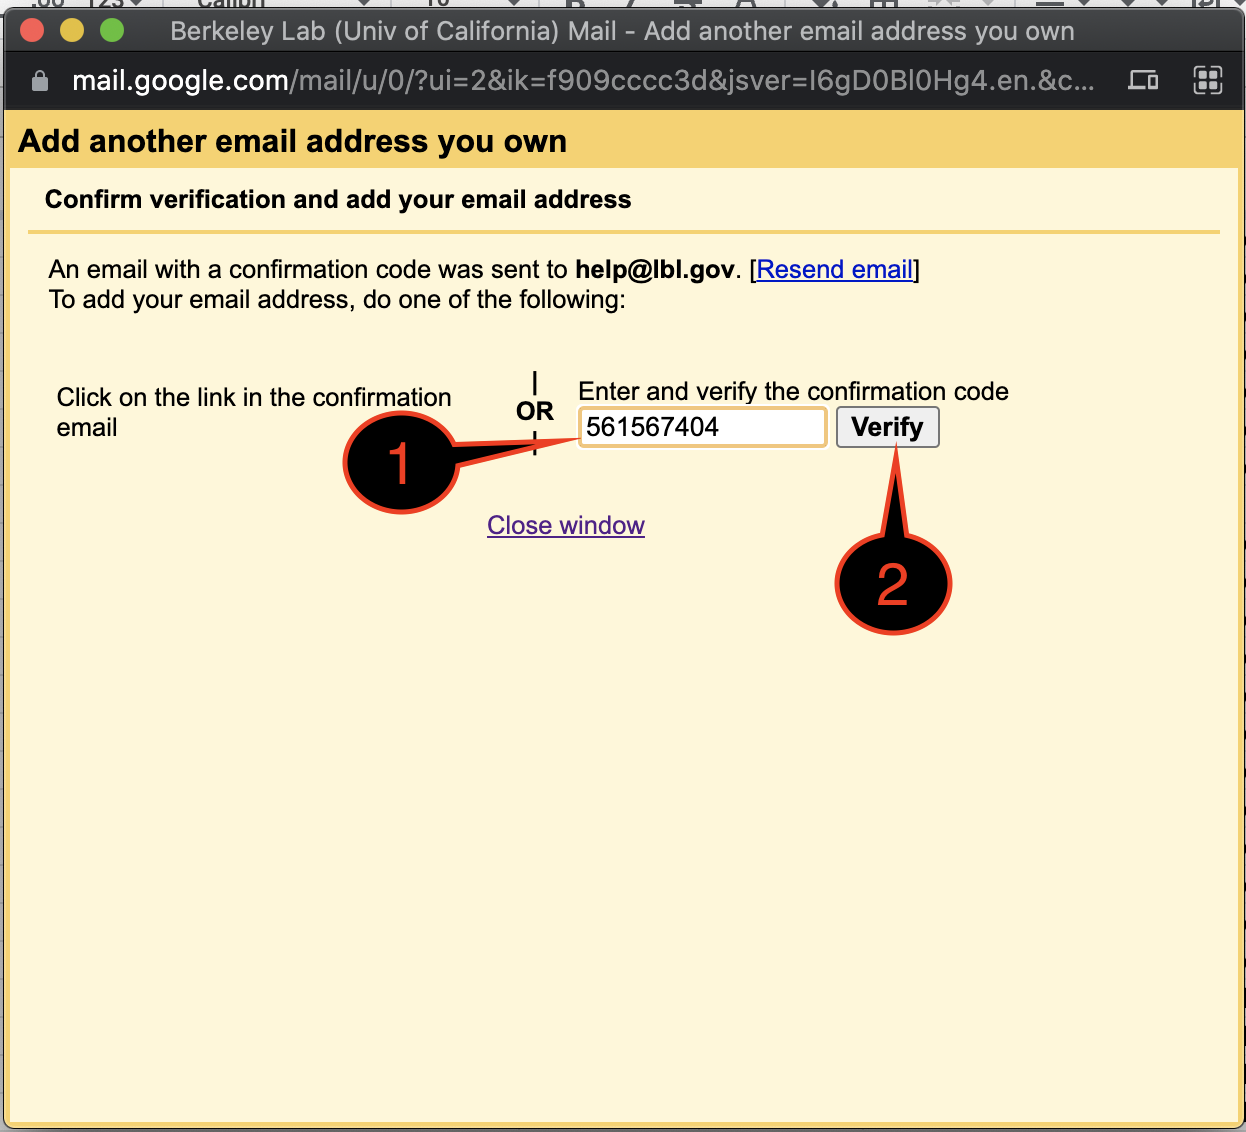
5
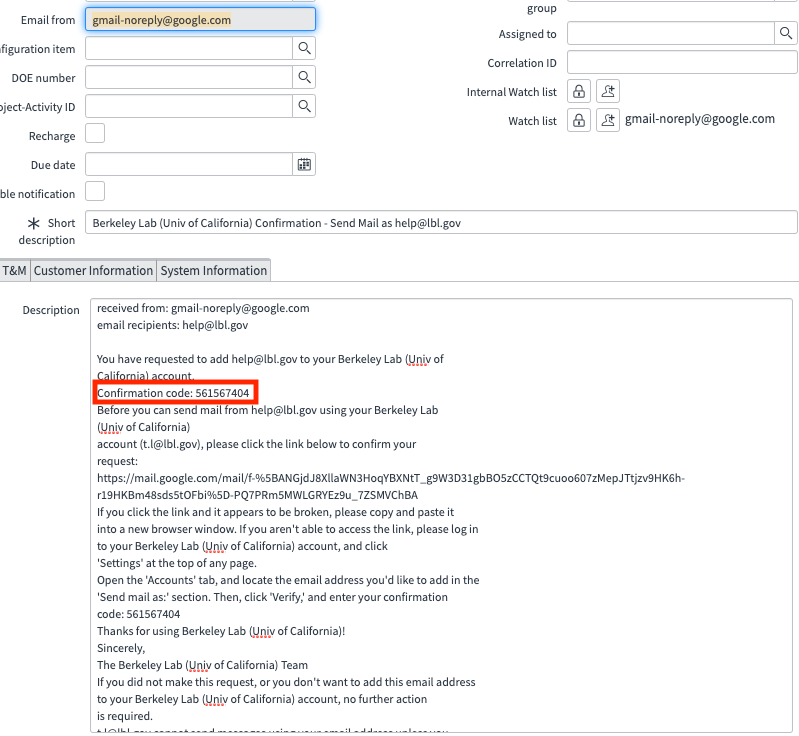
Go to the email you are trying to add and look for the email with "Berkeley Lab (Univ of California) Confirmation - Send Mail as EMAIL ADDRESS" and sent from gmail-noreply@google.com to get the Confirmation code
6
Input the confirmation code into the confirmation code box
Click Verify
7
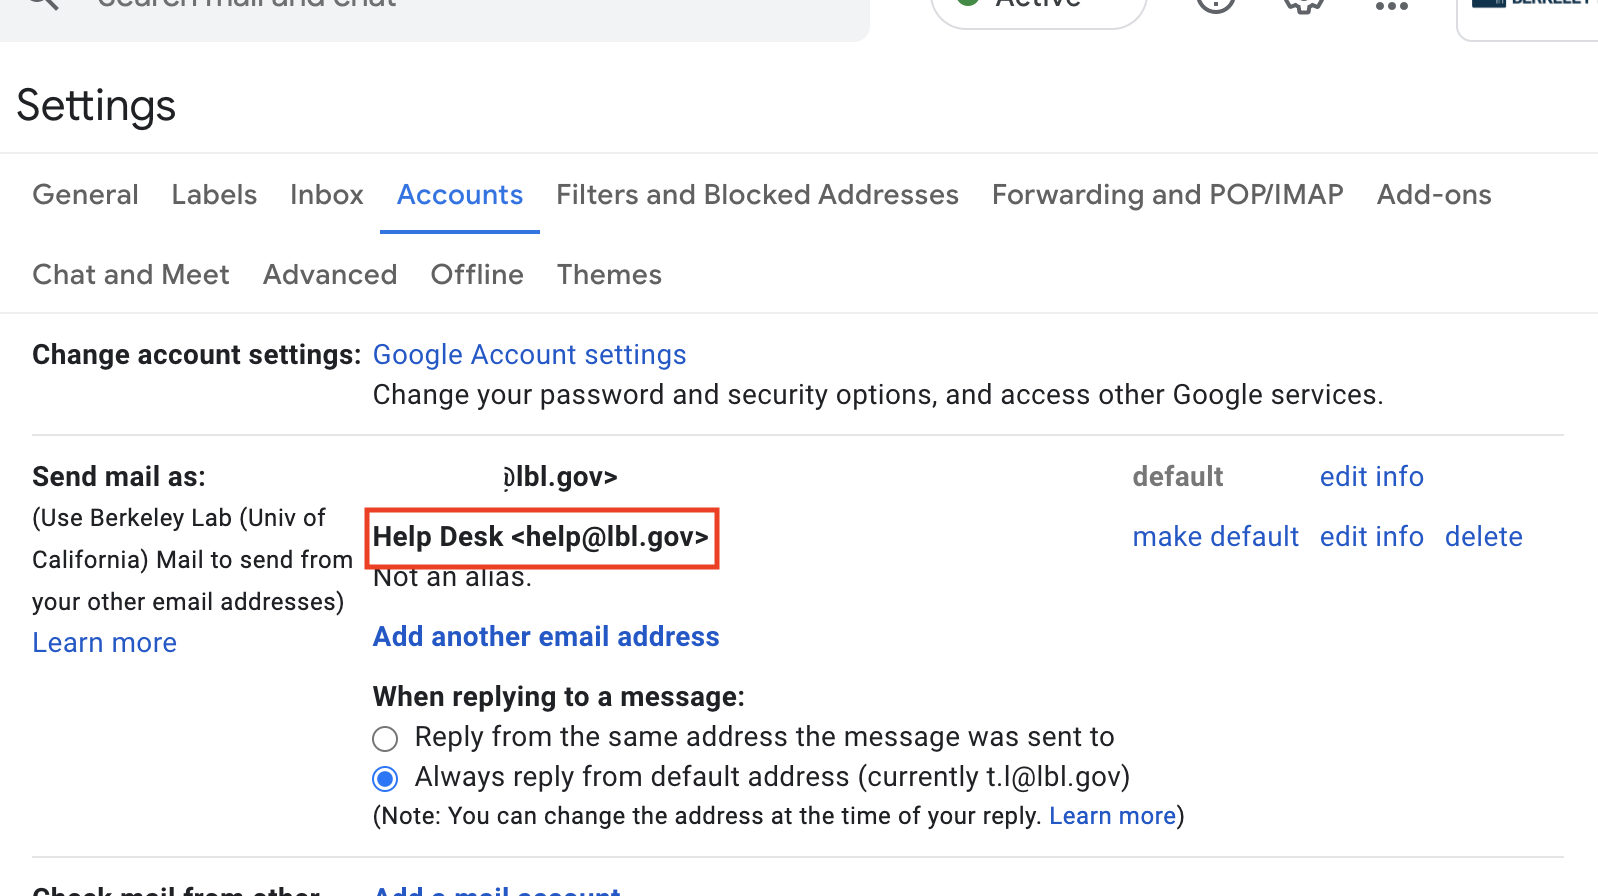
You will now see the email you added listed under the Send mail as section
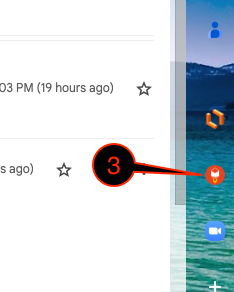
1
Sign in to your lbl.gov email account
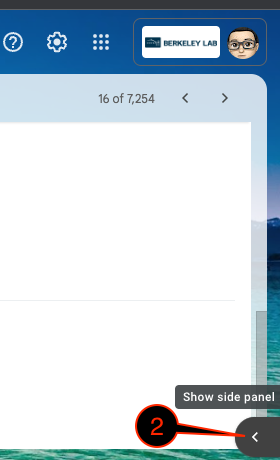
2
On the bottom right corner, you will see '<', click on it to show the Side Panel, if not visible already
3
In the Side Panel, click on YAMMicon
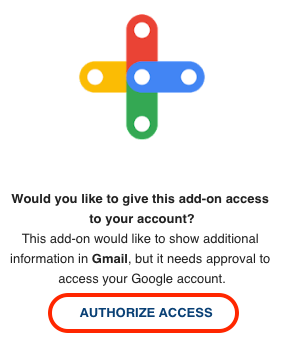
4
Click AUTHORIZE ACCESS
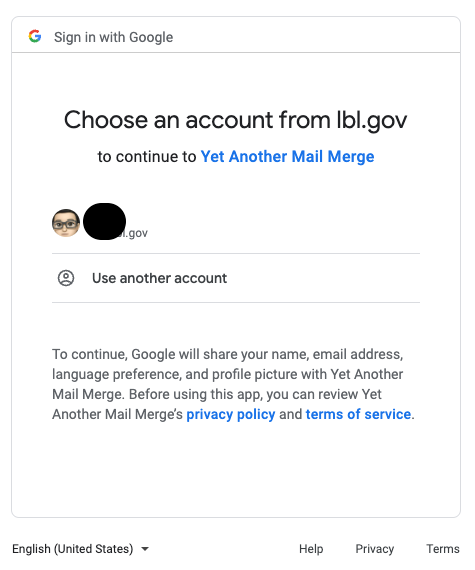
5
A pop-up asking you to select an email account will appear. Select your lbl.gov email account
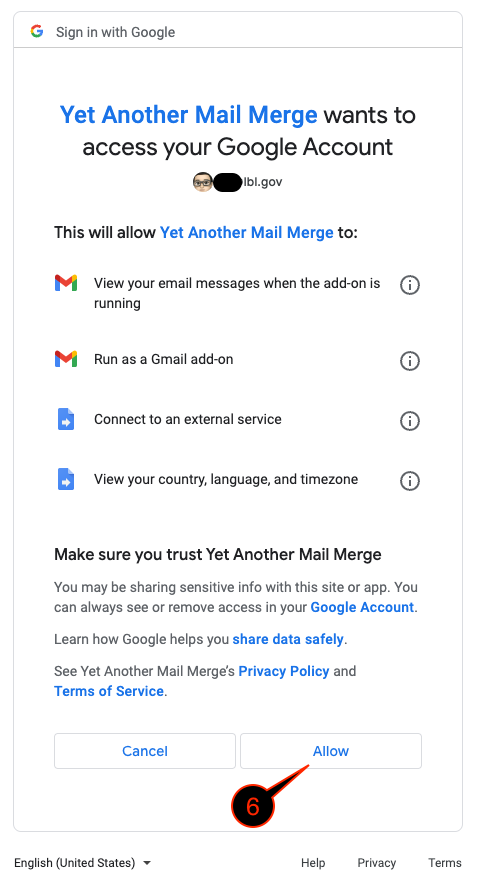
6
Click Allow to give YAMM access permission
1
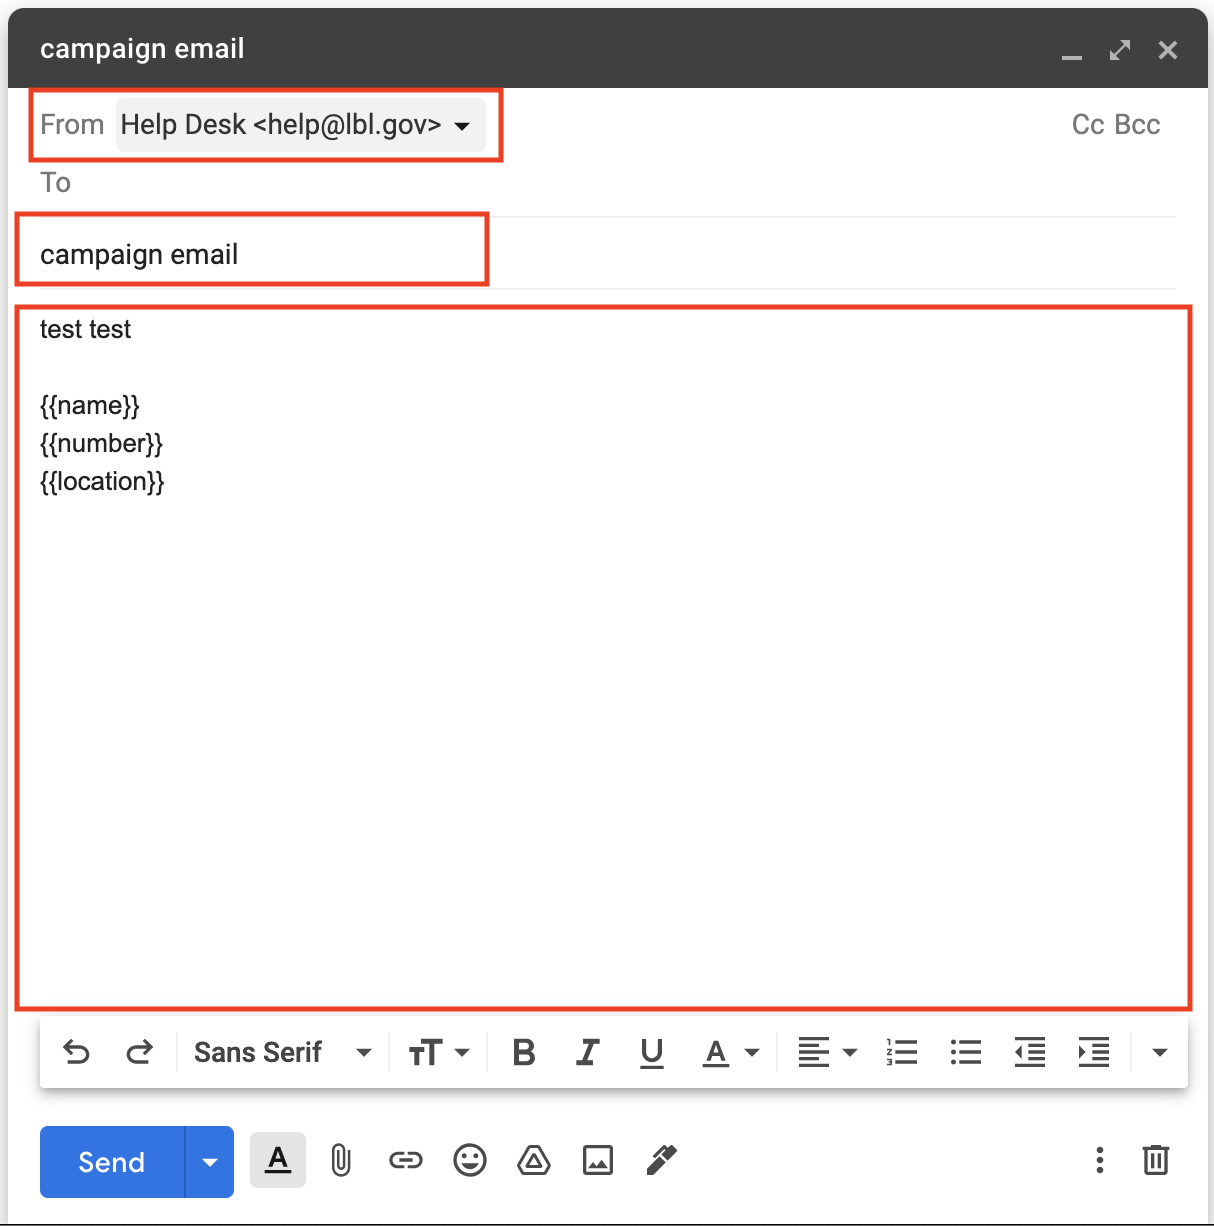
Create a draft email:
Leave the From field at the default option
Fill in the Subject and Body field
Leave the To field blank
2
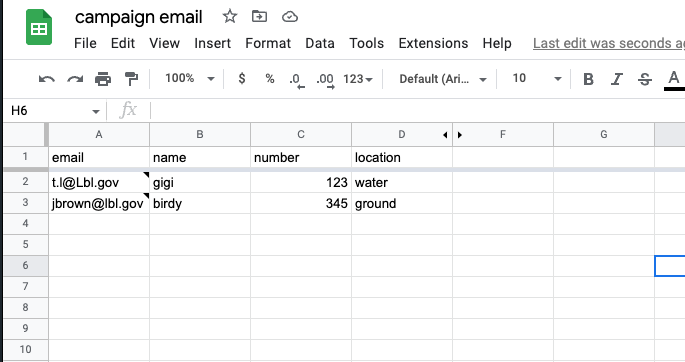
Grab or create a Google Sheet with recipients' email addresses and any other required information needed for the email campaign:
Make sure the email addresses are in the first column in the Google Sheet.
Make sure to link to the Google sheet column if you want to include the information by adding {{column name}} in the email draft from the previous step. The column name needs to be typed exactly the same as seen in the Google Sheet
1
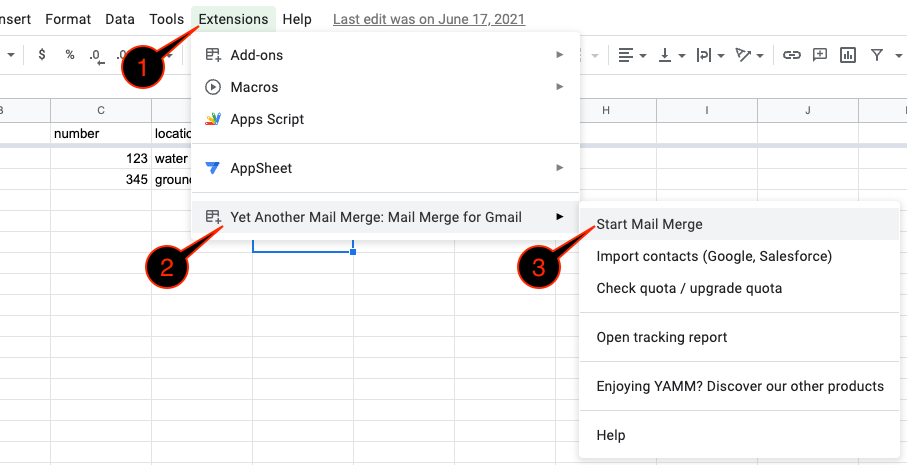
In the Google Sheet that you are using for the email campaign:
Click Extensions
Click Yet Another Mail Merge: Mail Merge for Gmail
Click Start Mail Merge
2
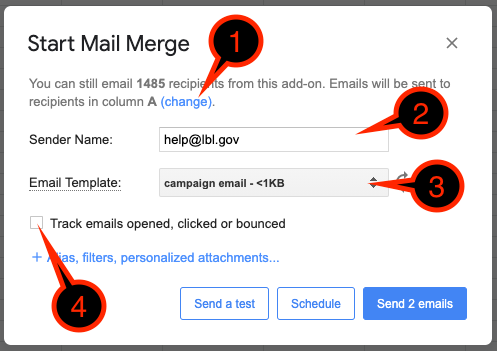
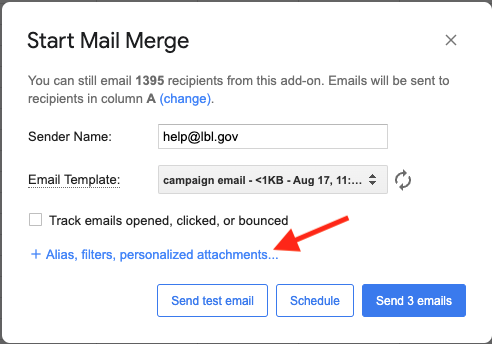
In the Start Mail Merge window:
You may be prompted to select the column for the email address, be sure to select the correct column. If not, you will see (change) in blue. You can click on it to confirm that the correct email column is selected
In the Sender Name field, type in the email that you are using to send as
In the Email Template field select the email draft you've created for the email campaign
Click on Alias, Filters, personalized attachments...
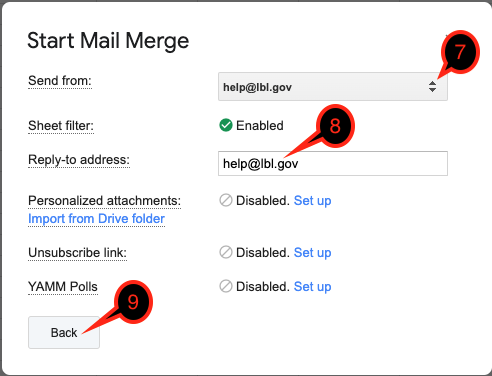
4
For Send from field, click the dropdown menu and select the email you want to send from
5
For the Reply-to address field:
Recommend that you put in the same email address as the Sendfrom field
You may put any email address that you want the reply to go to
If you leave it blank, replies will be sent to the email account in the Send from field
6
Click Back
7
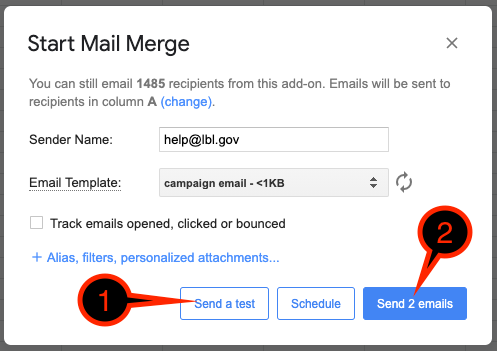
Now, before you send out the email campaign, do a test first:
Click on the Send a test button and you can check and make changes as you need. Keep in mind you can only send out 1,500 emails a day. If you have more emails to send, spread them out over multiple days
Once you are ready to send out the email, click Send # emails
8
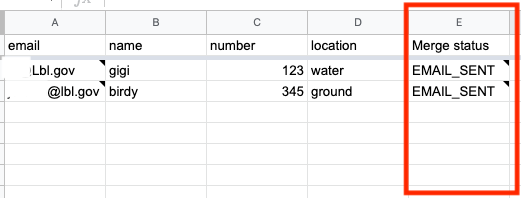
Once the email campaign has been sent, check back in the Google Sheets and you will see a new column titled Merge status with the status EMAIL_SENT. That means it was successful.
You can add more email addresses and information to the Google Sheet and reuse it. Previous recipients that already have EMAIL_SENT status under the Merge Status column will not get a duplicate email.
If you want to resend the email to previous recipients, just delete the EMAIL_SENT under the Merge Status column for the recipients.