Purpose of Knowledge Article:
- A guide on how to install or uninstall CrowdStrike Falcon from Berkeley Lab computers
- The CrowdStrike Falcon macOS installer is a universal binary and will work on Intel and Apple Silicon chipsets
- The install instructions for Windows also apply to CrowdStrike For Home
Resolution:
IMPORTANT:
- Be sure to select the correct instructions for the operating system you are using
- It is highly recommended to read the instructions before installing CrowdStrike Falcon
If you have Sophos Antivirus:
- If you have Sophos Antivirus on the computer, the CrowdStrike Falcon installer will uninstall it for you.
- If you have Sophos Antivirus on the computer, a restart will be required to finish the Sophos uninstallation process.
Install CrowdStrike Falcon
Expand the instructions for the operating system you are using:
The CrowdStrike Falcon macOS installer is a universal binary and will work on Intel and Apple Silicon (M1, and M2) chipsets
| 1 | Go to https://software.lbl.gov/swSoftwareDetails.php?applicationID=259 and download Crowdstrike Falcon 1.6 | no image |
| 4 | Run the CrowdStrike installer you just downloaded |
no image |
| 5 | Click Continue for the "Introduction" and "Read Me" section |
|
|
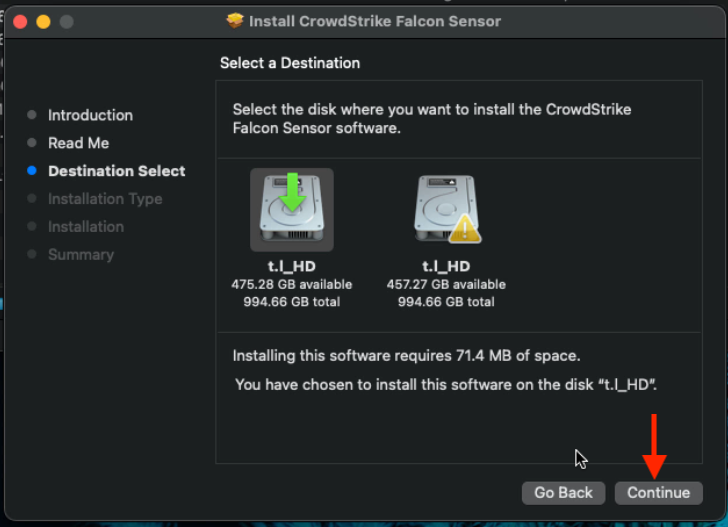
Leave the default destination as it is and click Continue Note: if you do not see this screen, continue to the next step. |
|
|
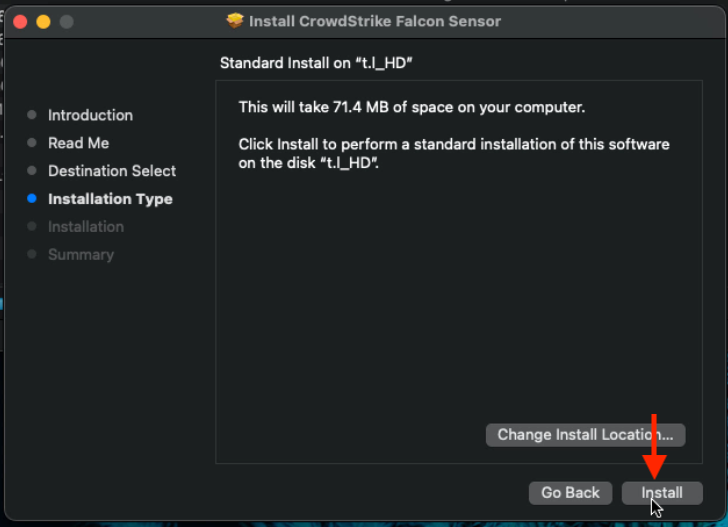
| 6 | Click Install |
|
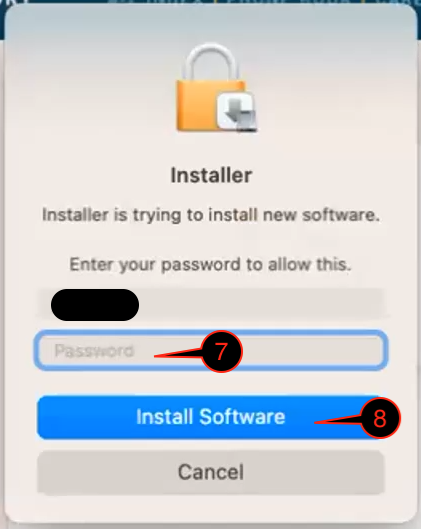
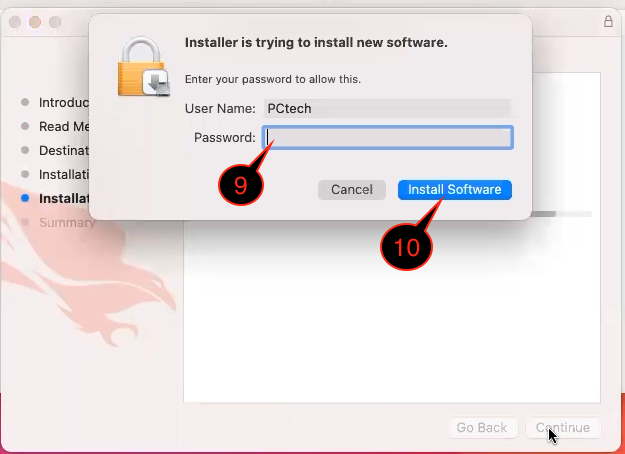
| 7 | Type in your computer password |
|
| 8 | Click Install Software | |
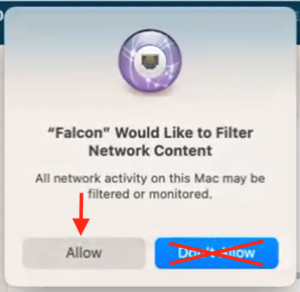
| 9 | Click Allow to the popup saying "'Falcon' would like to filter network content" |
|
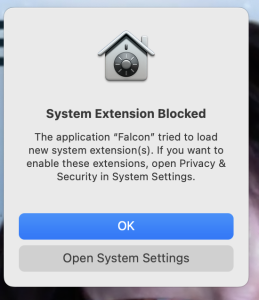
| 10 |
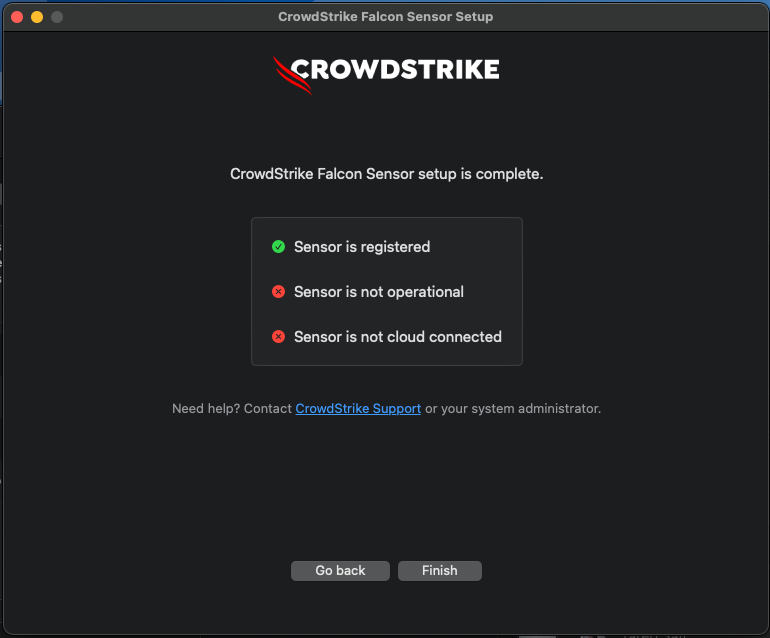
A "System Extension Blocked" popup will appear, click Open System Settings If the OK button was mistakenly clicked instead of Open System Settings here. A window from CrowdStrike will pop up (see below image) at some point during or after the installation.
|
|
| 11 | For Falcon, slide the toggle to on (it will turn blue) |
|
| 12 | Type in your computer password |
|
| 13 | Click OK | |
| 14 | Click Done |
|
| 15 |
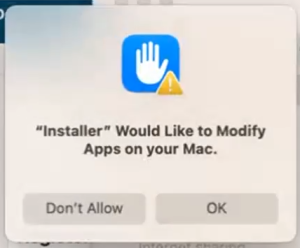
click OK on the popup saying "Installer would like to modify apps on your Mac" You may see this screen pop up, do not worry or panic. Continue to follow the instructions here and everything will turn green.
|
|
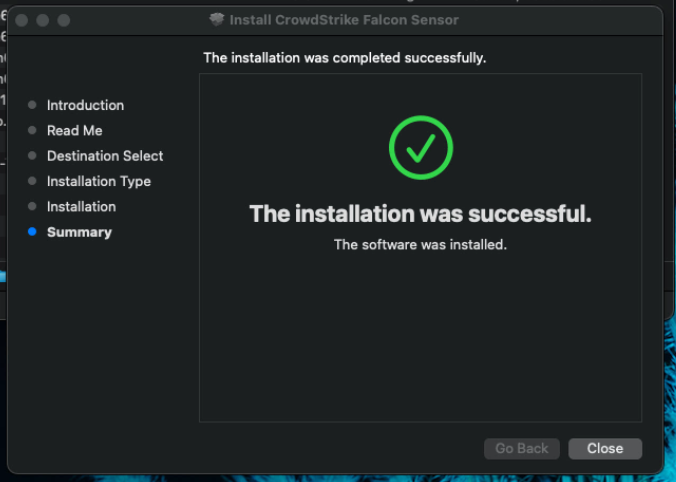
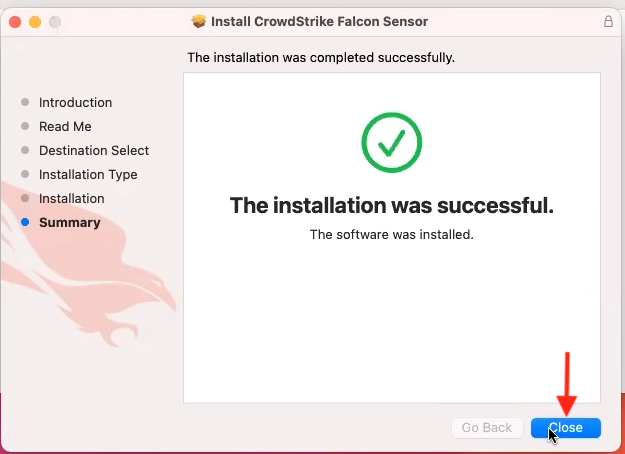
| 16 | Click Close |
|
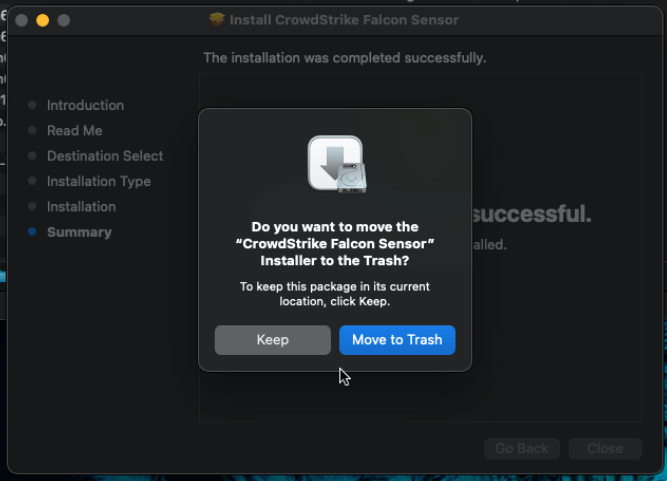
| 17 | Click Move to Trash and continue to Step 2 |
|


Purpose of Knowledge Article
Guide on how to give CrowdStrike Falcon permission on macOS 13 and newer
Resolution
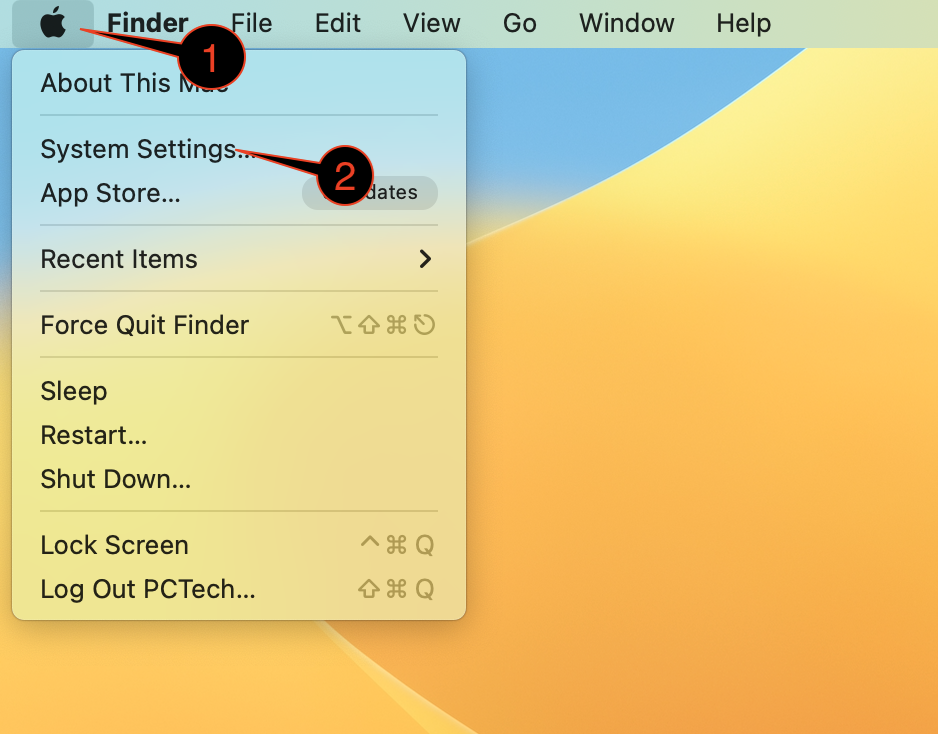
| 1 | Click the Apple icon on the top left corner
|
|
| 2 | Click System Settings | |
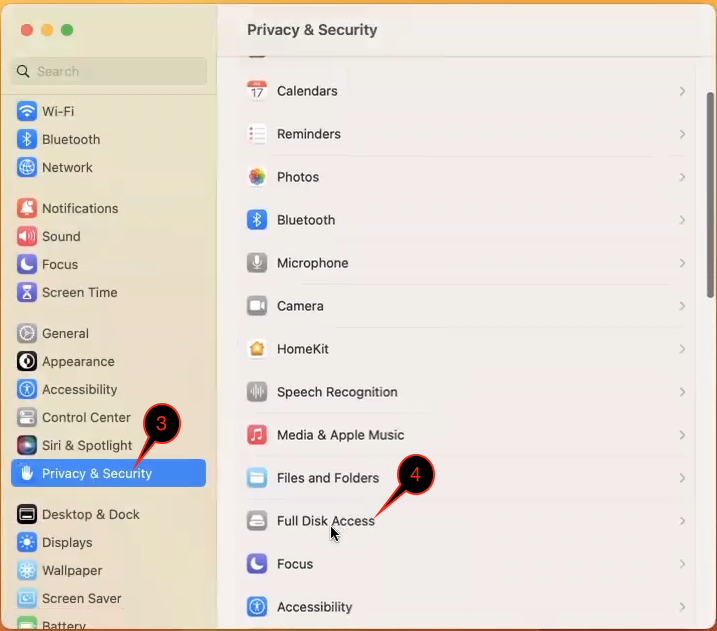
| 3 | Select Privacy & Security on the left column
|
|
| 4 | Select Full Disk Access on the right side |
|
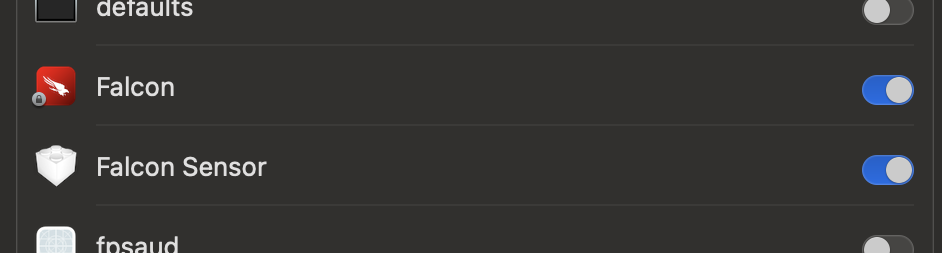
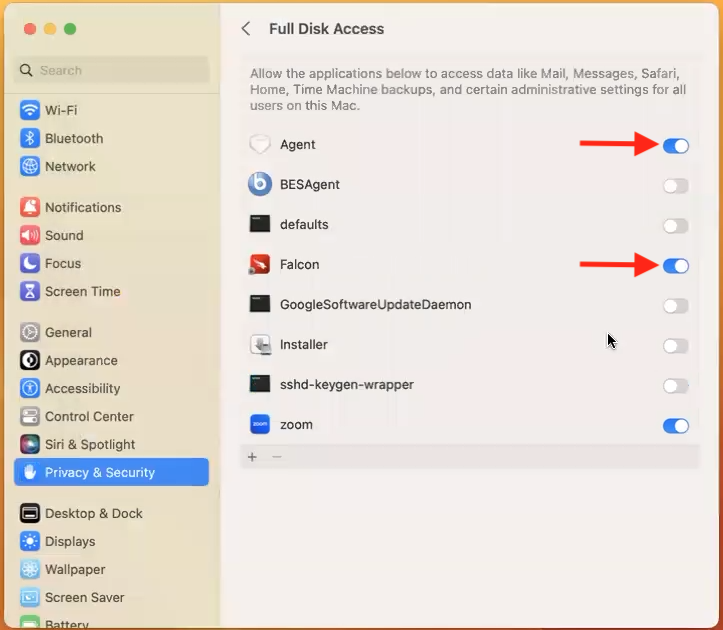
| 5 |
Toggle the slider to on for Agent, or Falcon Sensor Note: instead of Agent, it may be called Falcon Sensor instead. You will only see on of them, not both.
|
|
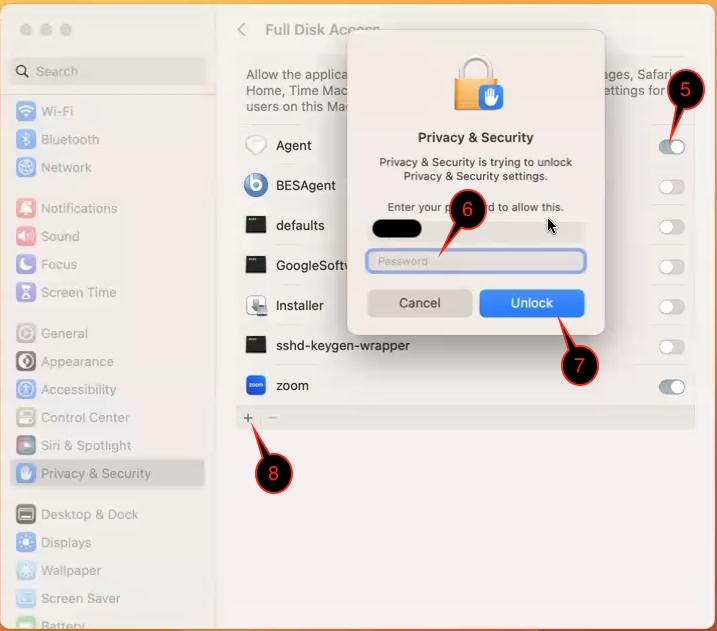
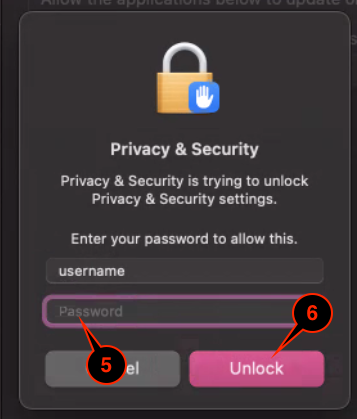
| 6 | Type in your computer password | |
| 7 | Click Unlock | |
| 8 | Click the + icon | |
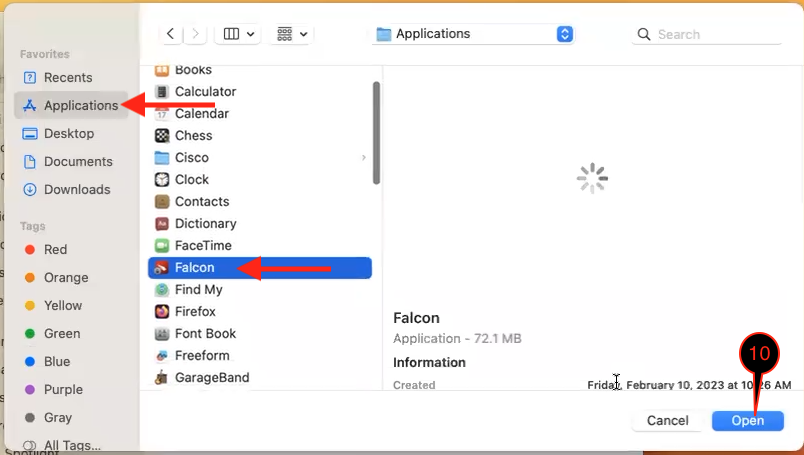
| 9 | Navigate to /Application/Falcon or Falcon.app and select it |
|
| 10 |
Click Open |
|
| 11 | Now, the sliders for Agent (or Falcon Sensor) and Falcon should both be toggled on You are done, close System Settings Note: if you have Sophos, you will need to restart the computer for Sophos to finish uninstalling. |
|
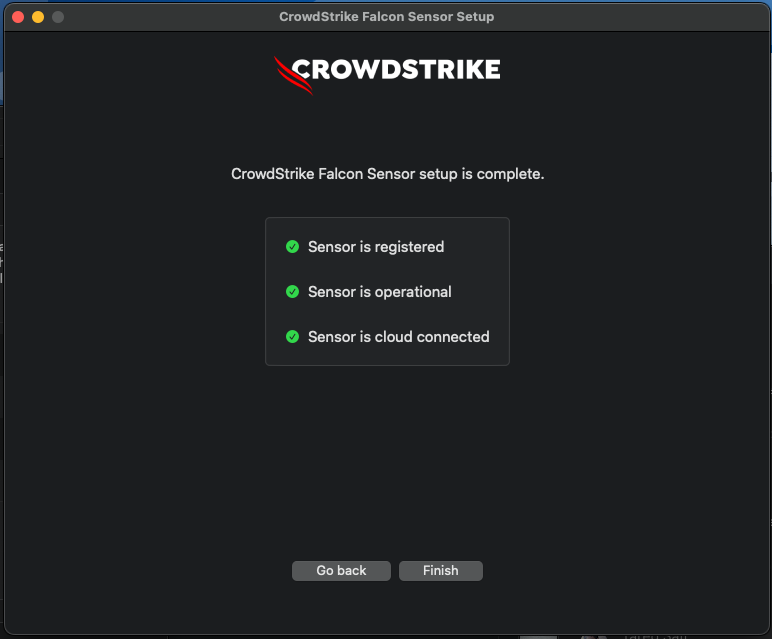
| 12 |
Remember this screen? You can click Finish now If you do not see this screen, see Is CrowdStrike Falcon Running? and do method 1 for Apple. |
|
The CrowdStrike Falcon macOS installer is a universal binary and will work on Intel and Apple Silicon (M1, and M2) chipsets
| 1 | Go to https://software.lbl.gov/swSoftwareDetails.php?applicationID=259 and download Crowdstrike Falcon 1.6 | no image |
| 4 | Run the CrowdStrike installer you just downloaded |
no image |
| 5 | Click Continue for the "Introduction" and "Read Me" section |
|
|
Leave the default destination as it is and click Continue Note: if you do not see this screen, continue to the next step. |
|
|
| 6 | Click Install |
|
| 7 | Type in your computer password |
|
| 8 | Click Install Software | |
| 9 | Click Allow to the popup saying "'Falcon' would like to filter network content" |
|
| 10 | A "System Extension Blocked" popup will appear, click Open System Settings |
|
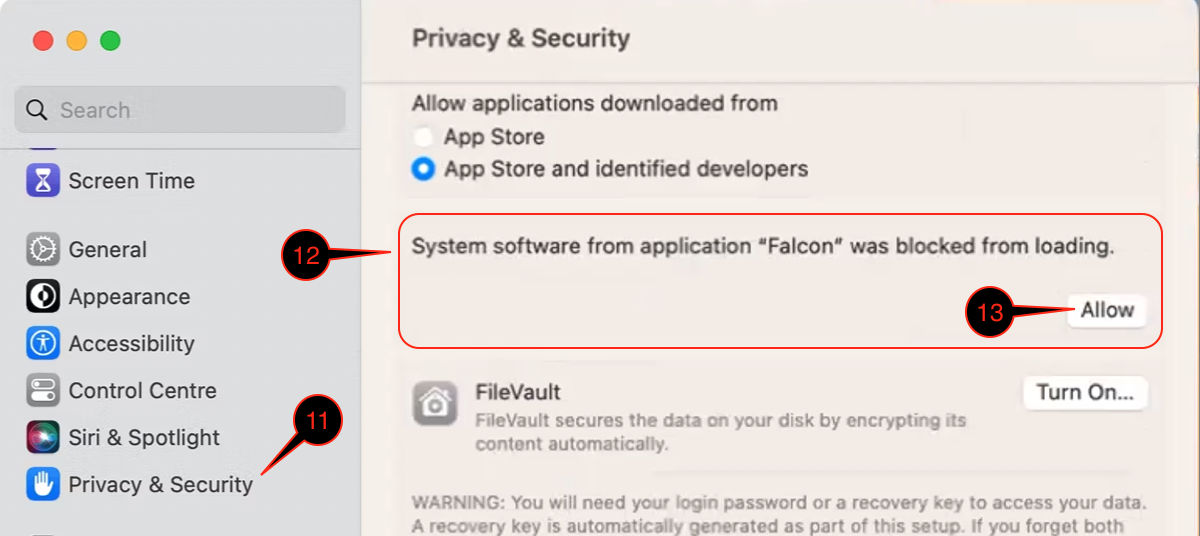
| 11 | Select Privacy & Security |
|
| 12 | Look for "System software from application "Falcon" was blocked from loading" | |
| 13 | Click Allow | |
| 14 | Type in your computer password |
|
| 15 | Click Unlock | |
| 16 |
click OK on the popup saying "Installer would like to modify apps on your Mac" You may see this screen pop up, do not worry or panic. Continue to follow the instructions here and everything will turn green.
|
|
| 17 | Click Close |
|
| 18 | Click Move to Trash and continue to Step 2 |
|
Purpose of Knowledge Article
Guide on how to give CrowdStrike Falcon permission on macOS 13 and newer
Resolution
| 1 | Click the Apple icon on the top left corner
|
|
| 2 | Click System Settings | |
| 3 | Select Privacy & Security on the left column
|
|
| 4 | Select Full Disk Access on the right side |
|
| 5 |
Toggle the slider to on for Agent, or Falcon Sensor Note: instead of Agent, it may be called Falcon Sensor instead. You will only see on of them, not both.
|
|
| 6 | Type in your computer password | |
| 7 | Click Unlock | |
| 8 | Click the + icon | |
| 9 | Navigate to /Application/Falcon or Falcon.app and select it |
|
| 10 |
Click Open |
|
| 11 | Now, the sliders for Agent (or Falcon Sensor) and Falcon should both be toggled on You are done, close System Settings Note: if you have Sophos, you will need to restart the computer for Sophos to finish uninstalling. |
|
| 12 |
Remember this screen? You can click Finish now If you do not see this screen, see Is CrowdStrike Falcon Running? and do method 1 for Apple. |
|
The CrowdStrike Falcon macOS installer is a universal binary and will work on Intel and Apple Silicon (M1, and M2) chipsets
| 1 | Go to https://software.lbl.gov/swSoftwareDetails.php?applicationID=259 and download CrowdStrike Falcon Sensor for macOS 12 and newer | no image |
| 2 | Run the CrowdStrike installer you just downloaded |
no image |
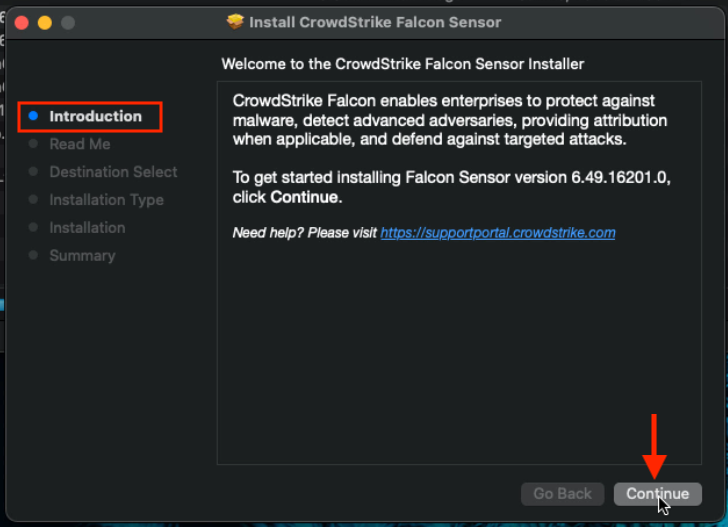
| 5 | Click Continue for the "Introduction" and "Read Me" section |
|
| 6 | Leave the default destination as it is and click Continue Note: if you do not see this screen, continue to the next step. |
|
| 7 | Click Install |
|
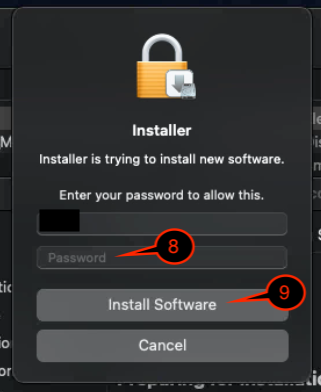
| 8 | Type in your computer password |
|
| 9 | Click Install Software | |
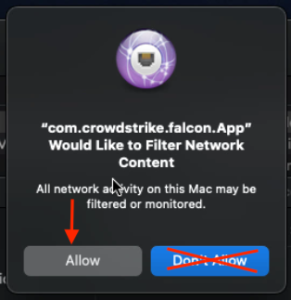
| 10 | Click Allow to the popup saying "com.crowdstrike.falcon.app" would like to filter network content" |
|
| 11 | A "System Extension Blocked" popup will appear, click Open Security Preferences |
|
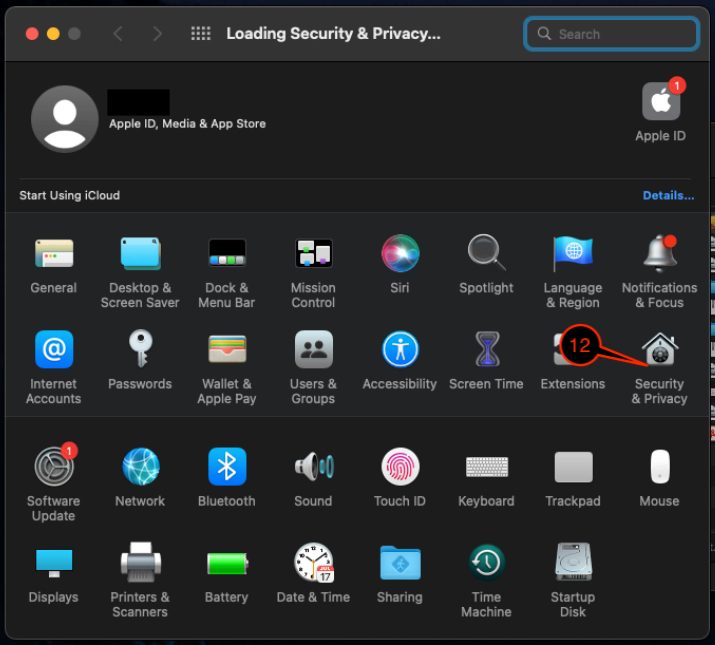
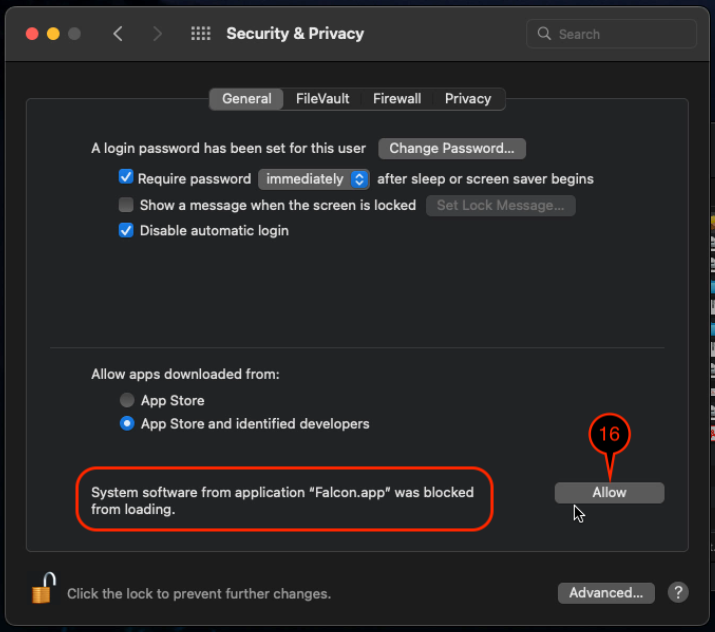
| 12 | Select Security & Privacy |
|
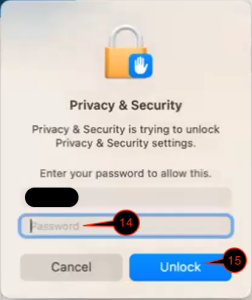
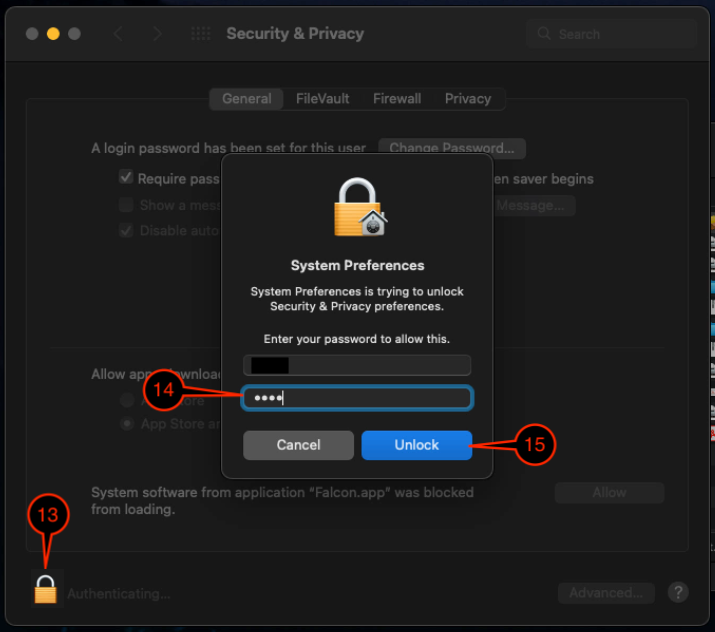
| 13 | Click the Lock icon on the bottom left |
|
| 14 | Type in your computer password | |
| 15 | Click Unlock | |
| 16 |
Look for "System software from application "Falcon.app" was blocked from loading", and click Allow You may see this screen pop up, do not worry or panic. Continue to follow the instructions here and everything will turn green.
|
|
| 17 | Installation is done. Click Close |
|
| 18 | Click Move to Trash and continue to Step 2 |
|
- The CrowdStrike Falcon macOS installer is a universal binary and will work on Intel and Apple Silicon (M1, and M2) chipsets
- Please be aware that CrowdStrike Falcon support for macOS 11 (Big Sur) will be discontinued on December 31, 2023
- You will need to upgrade to a supported version of macOS and if you need help with the upgrade, email [email protected]
| 1 | Go to software.lbl.gov and download CrowdStrike Falcon Sensor for macOS 11 | no image |
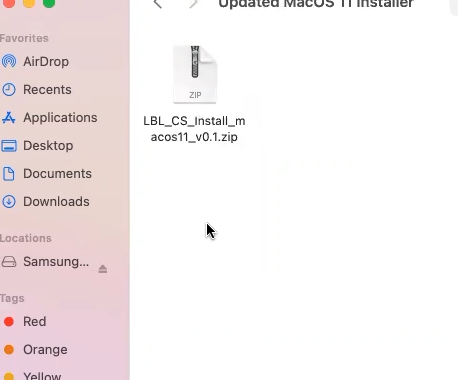
| 2 | Browse to the location where the file LBL_CS_MacOS11_vX.X is downloaded, and double-click on it |
|
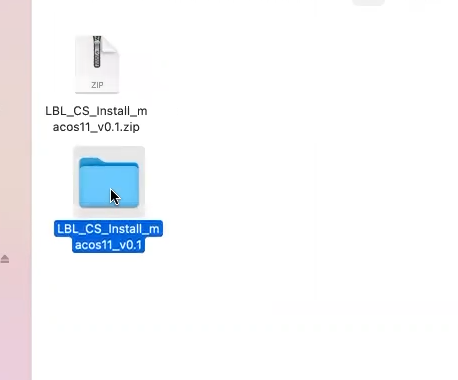
| 3 | It will extract a folder called LBL_CS_MacOS11_vX.X, open it. Leave this folder open, you will return to it. |
|
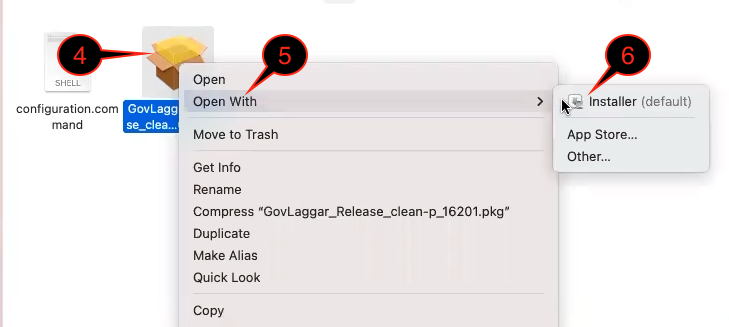
| 4 | Right-click on the GovLagger... file |
|
| 5 | Select Open With | |
| 6 | Select Installer | |
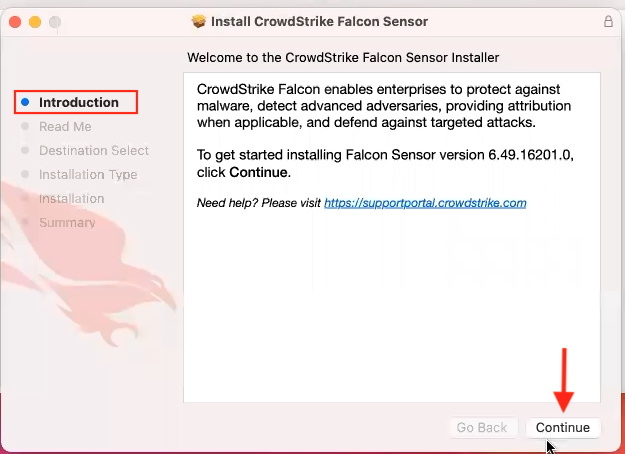
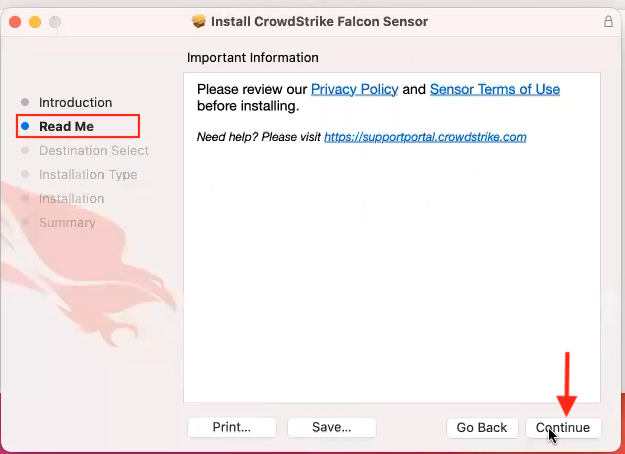
| 7 | Click Continue for the "Introduction" and "Read Me" section |
|
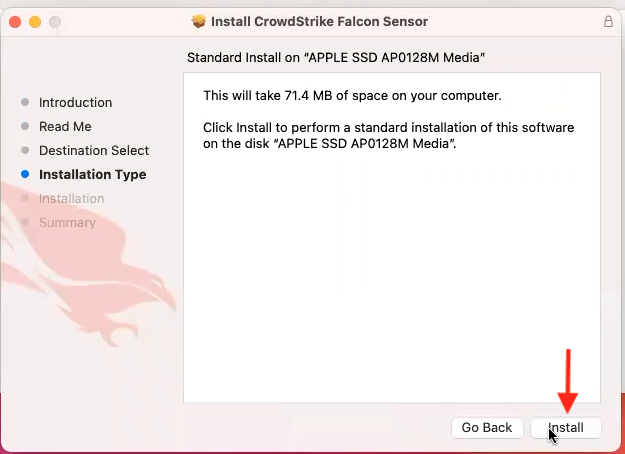
| 8 | Click Install |
|
| 9 | Type in your computer password |
|
| 10 | Click Install Software | |
| 11 | Click Close |
|
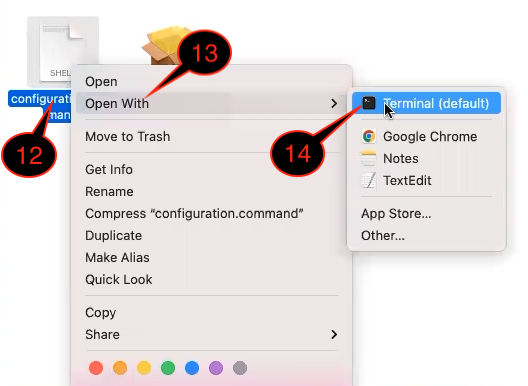
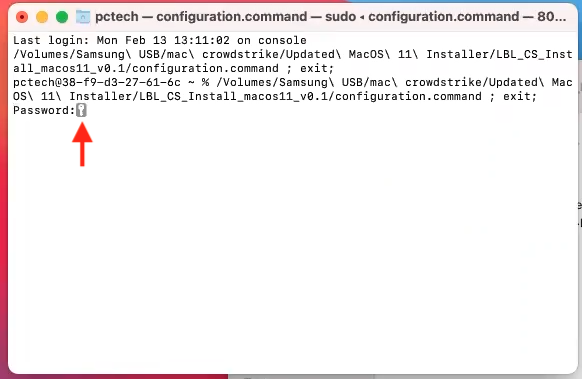
| 12 | Return to the LBL_CS_MacOS11_vX.X folder from step 3 and right-click on the file configuration.command |
|
| 13 | Select Open With | |
| 14 | Select Terminal | |
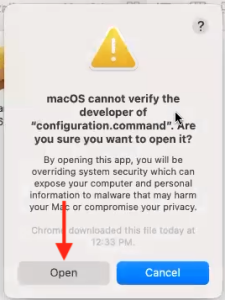
| 15 | Click Open to the popup saying "macOS cannot verify the developer of "configuration.command". Are you sure you want to open it?" |
|
| 16 | In the terminal window that pops up, type in your computer password and hit enter Note: no character will appear when you type the password here. |
|
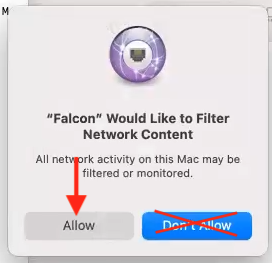
| 17 | Click Allow to the popup saying "Falcon would like to filter network content" |
|
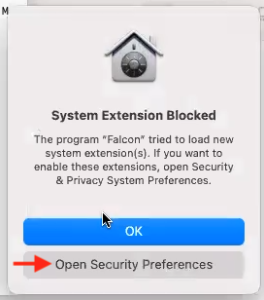
| 18 | A "System Extension Blocked" popup will appear, click Open Security Preferences |
|
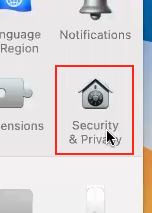
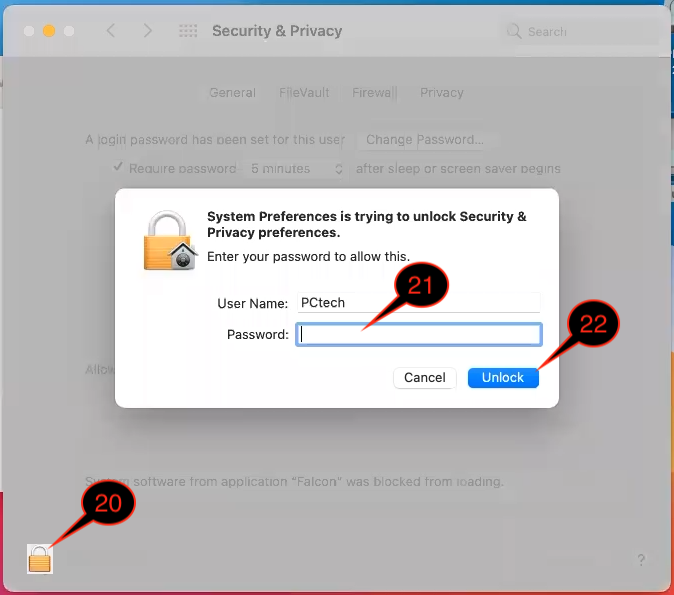
| 19 | Select Security & Privacy |
|
| 20 | Click the Lock icon on the bottom left |
|
| 21 | Type in your computer password | |
| 22 | Click Unlock | |
| 23 | Look for "System software from application "Falcon" was blocked from loading", and click Allow |
|
| 24 | This process may take between 3-8 minutes. Once done you will see it say [Process Completed] Continue to Step 2 |
|


Instructions for Windows 10 and Windows 11 are essentially the same. The main difference is how they look.
The install instructions for Windows also apply to CrowdStrike For Home.
| 1 | Go to https://software.lbl.gov/swSoftwareDetails.php?applicationID=259 and download CrowdStrike Falcon Sensor for Windows | no image |
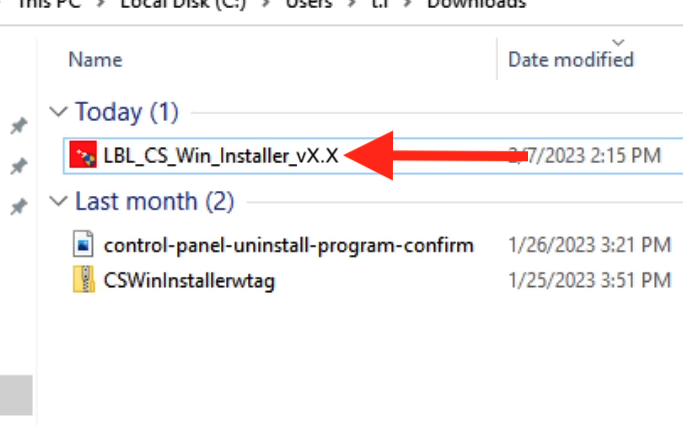
| 2 | Browse to the location where the file LBL_CS_Win_Installer_vX.X is downloaded, and double-click on it |
|
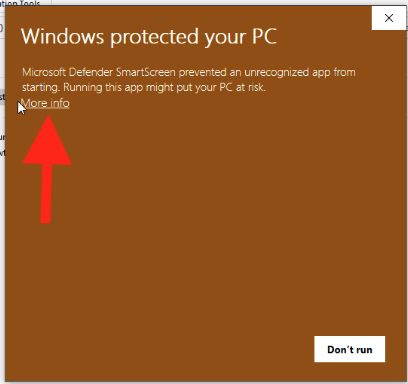
| 3 | You may see the popup "Windows Protected your PC" Click More info If not, skip to Step 5 |
|
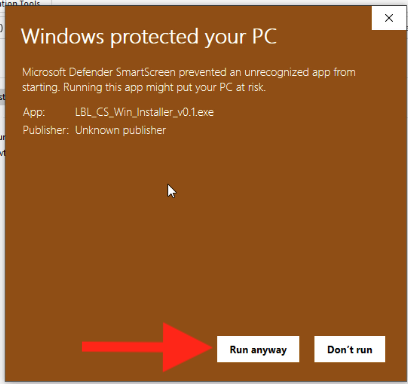
| 4 | Click Run anyway |
|
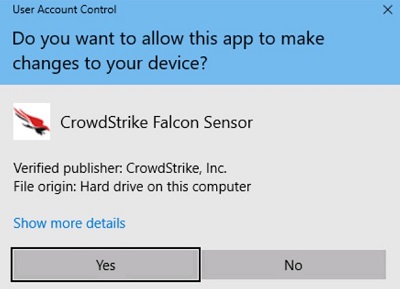
| 5 | The pop-up "Do you want to allow this app to make changes to your device?" will appear Click Yes |
|
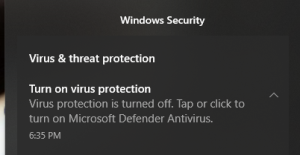
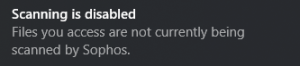
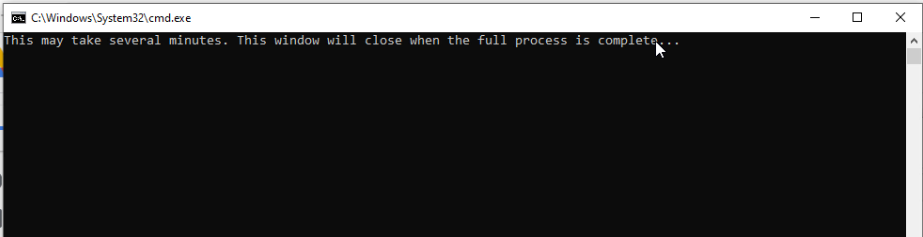
| 6 |
A command prompt window will appear stating "This may take several minutes. This window will close when the full process is complete" This process will take between 4 to 10 minutes If you have Sophos, you will need to restart the computer for Sophos to finish uninstalling. During this process, you may see the following notifications in the bottom right corner. You can ignore it.
This happens because during the transient state, Sophos Antivirus is being removed and CrowdStrike Falcon is being installed. |
|
| 7 | Once the command prompt window disappears. You are done. If you want to confirm CrowdStrike Falcon is installed and running, see Is CrowdStrike Falcon Running? |
no image |
Uninstall CrowdStrike Falcon
Before you proceed to uninstall CrowdStrike Falcon, please complete the CrowdStrike Falcon Maintenance Token Request form. Once you received the maintenance token, you can follow the instructions below to uninstall CrowdStrike Falcon.
| 1 | Be sure to quit the Terminal app before beginning Under the Apple icon in the top left corner, click System Settings |
|
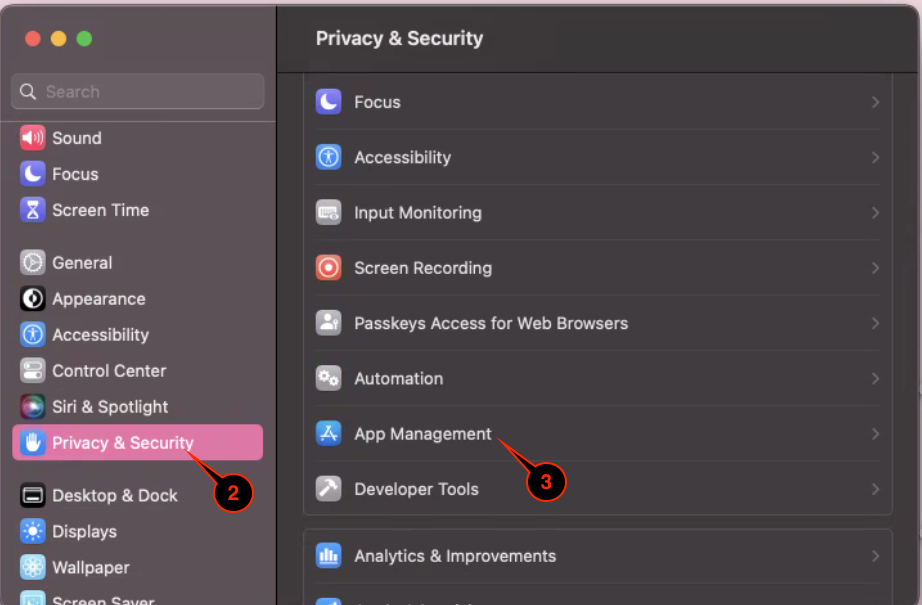
| 2 | On the left column, select Privacy & Security |
|
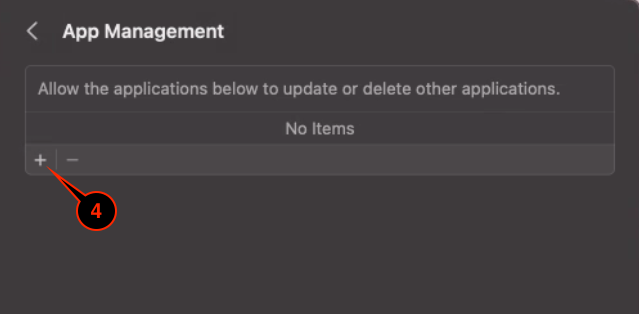
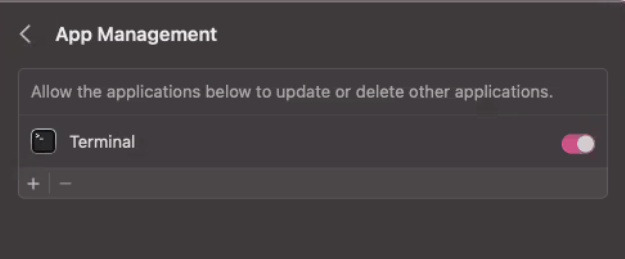
| 3 | On the right column, select App Management | |
| 4 | Click the + icon |
|
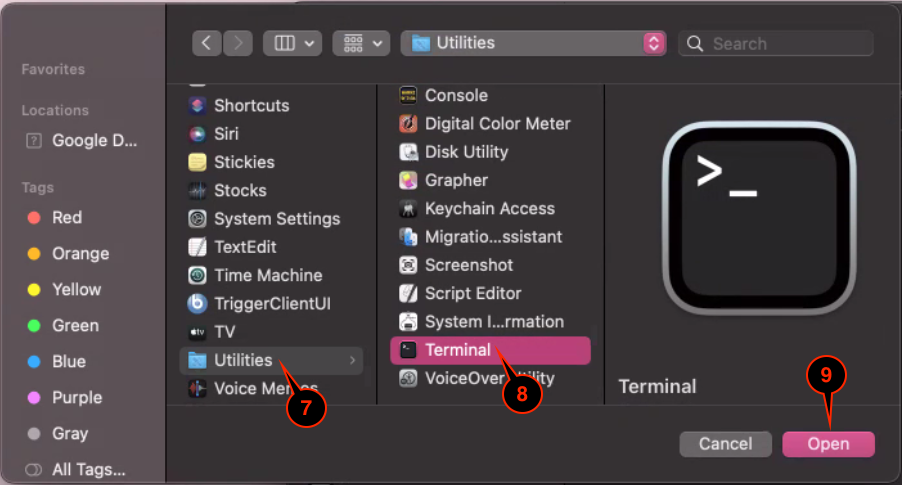
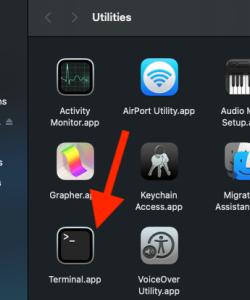
| 5 | Select Utilities |
|
| 6 | Select Terminal | |
| 7 | Click Open | |
| 8 | Type in your computer password |
|
| 9 | Click Unlock | |
| 10 |
The Terminal app should now appear under App management Continue to Part 2 info If you left the Terminal app running, you will this popup:
You can click Later and manually quit the Terminal app or click Quit & Reopen so the system does it for you now. This needs to be done before continuing to Part 2. |
|
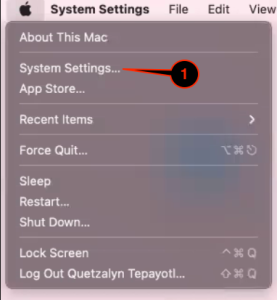

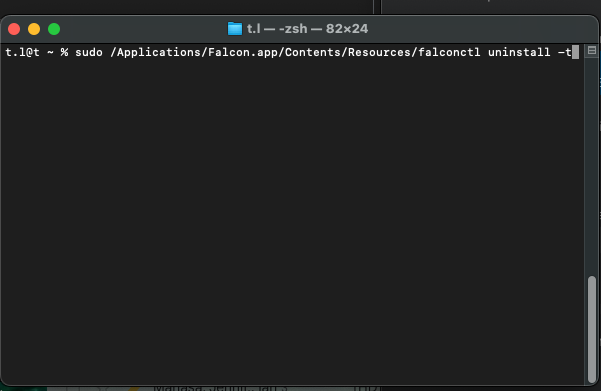
| 1 | Launch the Terminal app from the Utilities folder |
|
| 2 | Run sudo /Applications/Falcon.app/Contents/Resources/falconctl uninstall -t |
|
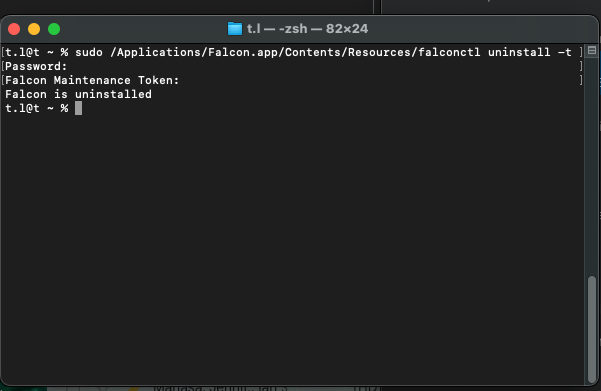
| 3 | Type in your computer password and hit Enter key on your keyboard | 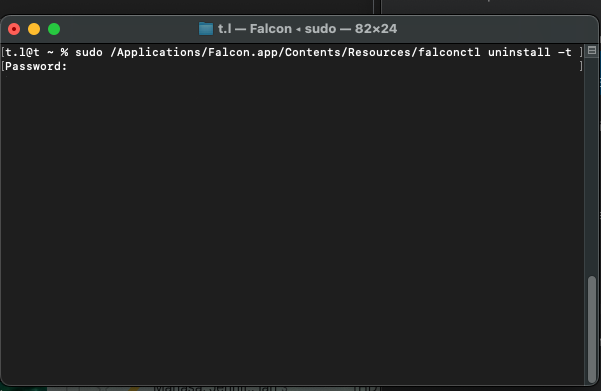 |
| 4 | Copy and paste in the maintenance token you received Note: nothing will show up as you input the maintenance token, so be sure to only paste it once and hit enter |
|
| 5 | You will see a confirmation saying "Falcon is uninstalled" Note: you must restart the computer to complete the uninstallation process |
|

| 1 | Launch the Terminal app from the Utilities folder |
|
| 2 | Run sudo /Applications/Falcon.app/Contents/Resources/falconctl uninstall -t |
|
| 3 | Type in your computer password and hit Enter key on your keyboard | |
| 4 | Copy and paste in the maintenance token you received Note: nothing will show up as you input the maintenance token, so be sure to only paste it once and hit enter |
|
| 5 | You will see a confirmation saying "Falcon is uninstalled" Note: you must restart the computer to complete the uninstallation process |
|
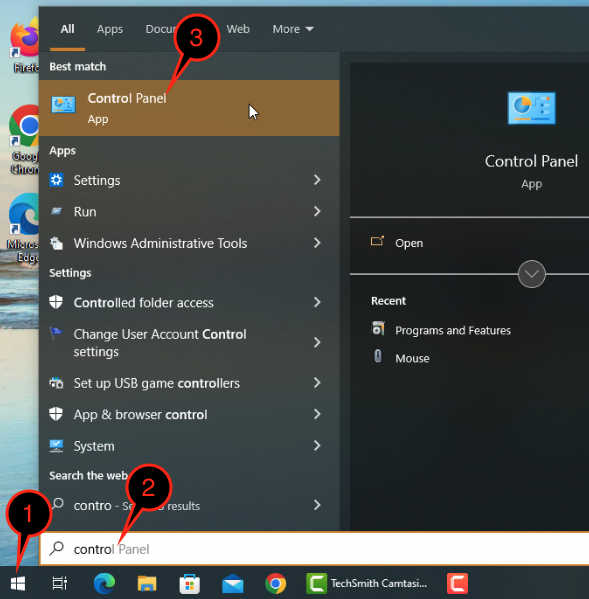
| 1 | Click on the Start Menu icon |
|
| 2 | Type in Control Panel | |
| 3 | Click Control Panel | |
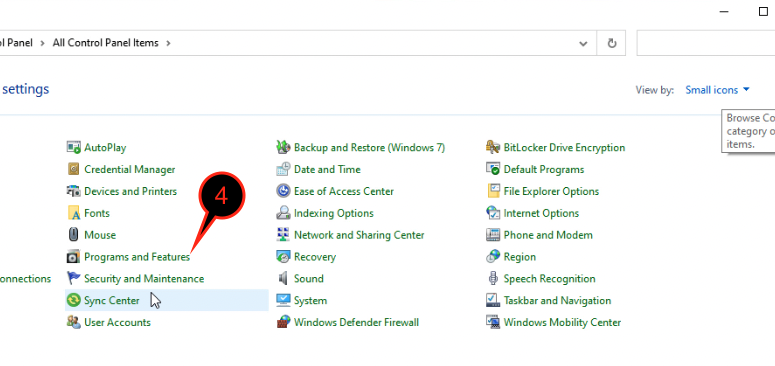
| 4 | Click Programs and Features |
|
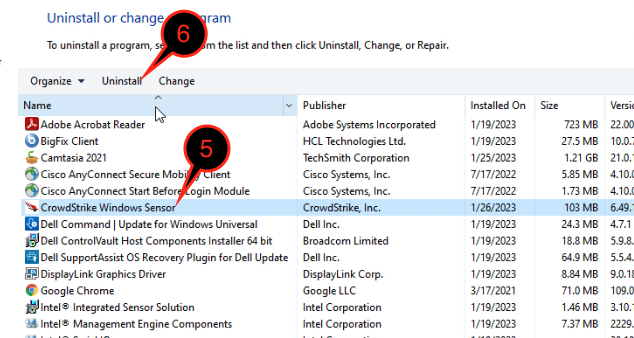
| 5 | Select CrowdStrike Windows Sensor in the list |
|
| 6 | Click Uninstall | |
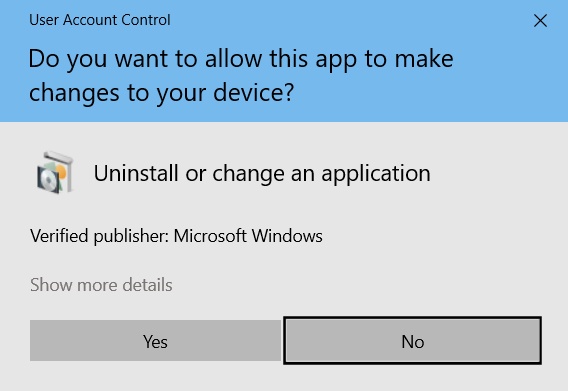
| 7 | The Do you want to allow this app to make changes to your device will pop up Click Yes |
|
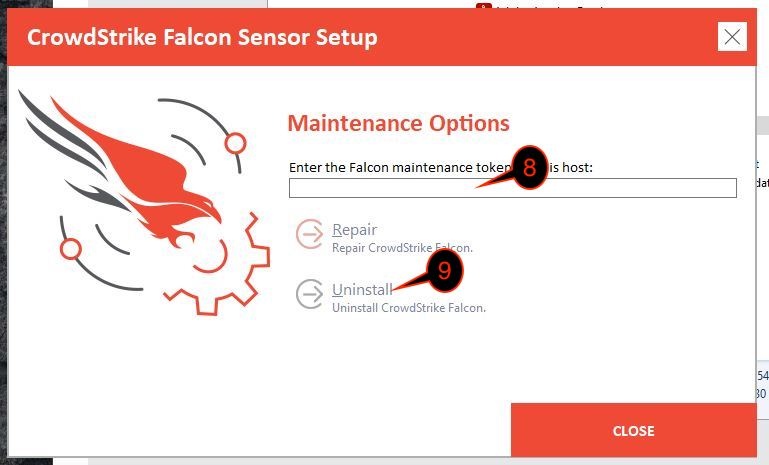
| 8 | Paste or type in the maintenance token |
|
| 9 | Click Uninstall | |
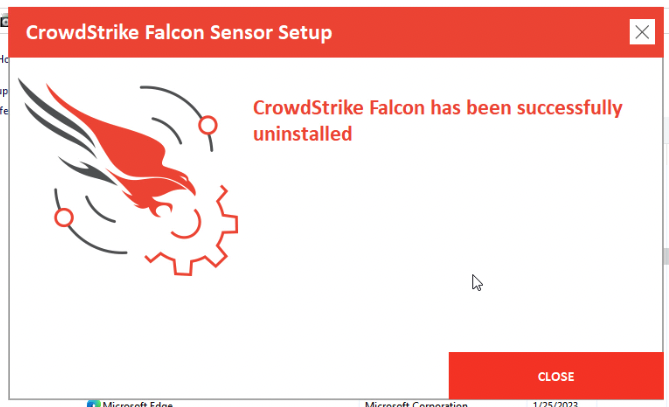
| 10 | The uninstallation process will take a moment. When it is done, click Close |
|