Please click on one of the tabs below to learn more about using and setting up each print option.
Google Cloud Print
Google Cloud Print makes your local and work printers available to you from any Google application. It allows you to print over the web, from anywhere, to any printer. In order to print using the Google Cloud Print service, you must connect your printer to a service. Printing can only be done from within an app on the device. You will need Google Chrome installed on your computer to do this.
Connect a Printer |
|
|---|---|
|
|
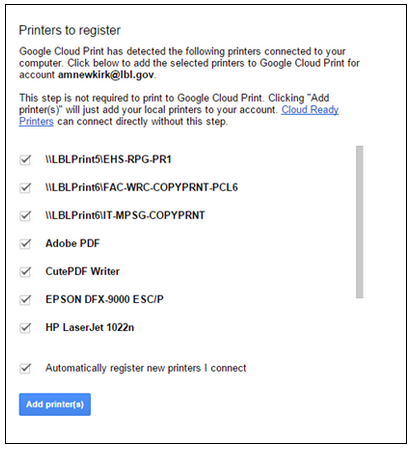
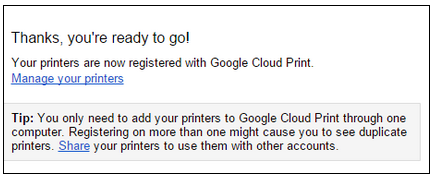
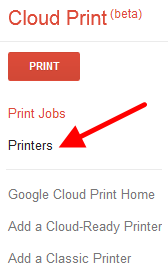
Manage Printers Connected to the Google Cloud Print Service |
|
| Add or delete printers using these steps |
|
Toshiba e-BRIDGE Print & Capture
Toshiba e-BRIDGE Print & Capture is an application that allows you to print to an available Toshiba printer from your mobile device. Note that printing is not to be started directly from within the e-BRIDGE app except for when you want to print photos stored on your device.
| Installing Toshiba e-BRIDGE Print & Capture | |
|---|---|
Follow the steps at right for installing the application on your device. NOTE: If multiple printers are configured, user can select printer by tapping on bar showing available printers and swiping down. |
|
| Printing From Common Applications | |
| Adobe Reader | Open in >Import with e-BRIDGE |
| Bluebeam | Open in > Import with e-BRIDGE |
| Google Docs | Share & Export >Send a Copy >PDF >OK >Import with e-BRIDGE |
| Google Sheets | Share & Export >Send a Copy >PDF >OK >Import with e-BRIDGE |
| Google Slides | MS PowerPoint required - contact Help Desk for assistance |
| Microsoft Excel | File >Print >Open in Another App >Next >Import with e-BRIDGE |
| Microsoft PowerPoint | File >Print >Open in Another App >Import with e-BRIDGE |
| Microsoft Word | File >Print >Open in Another App >Import with e-BRIDGE |
| Smartsheets | Print or Export >PDF >upload Arrow >Import with e-BRIDGE |
| Yahoo Mail | Print or share >Import with e-BRIDGE |
| Printing Photos Stored on Your Device | |
Will only print photos stored on your devices using the native camera. User must grant access to their Photos for the app to print them. |
|
| Apps Not Compatible With e-BRIDGE Print & Capture | |
| These apps are not compatible with the Toshiba eBRIDGE Print & Capture. |
|
If you have any questions or need support, please email [email protected] for further information.